In this article, we will explain step by step how to create a Salesforce Developer free account and how to use it with Stambia Designer.
If you already have an account, you can skip this article, you are ready to perform the demonstration project!
Create your account
Go to https://developer.salesforce.com/signup and fill the application form with your information.
You will then receive an email with a link that will allow you to verify your account. You can then login to your account.
Once logged in, you will need to Switch to Salesforce classic, as shown in the picture below.
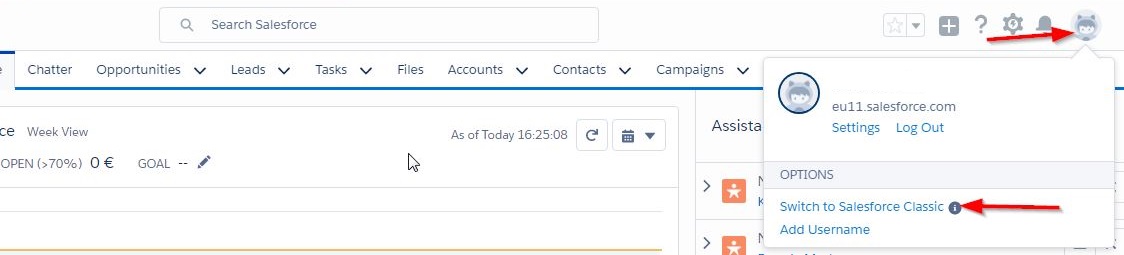
Next step is to generate a security token, since you will need it to connect to your account with Stambia Designer.
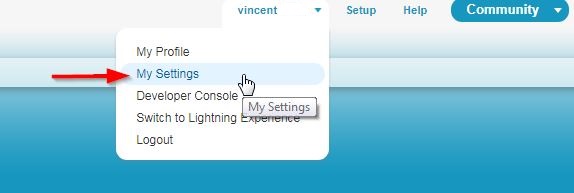
For this, click on your username and then My Settings.
On the Settings page, go to Personal, then Reset My Security Token. Finally click on the button.
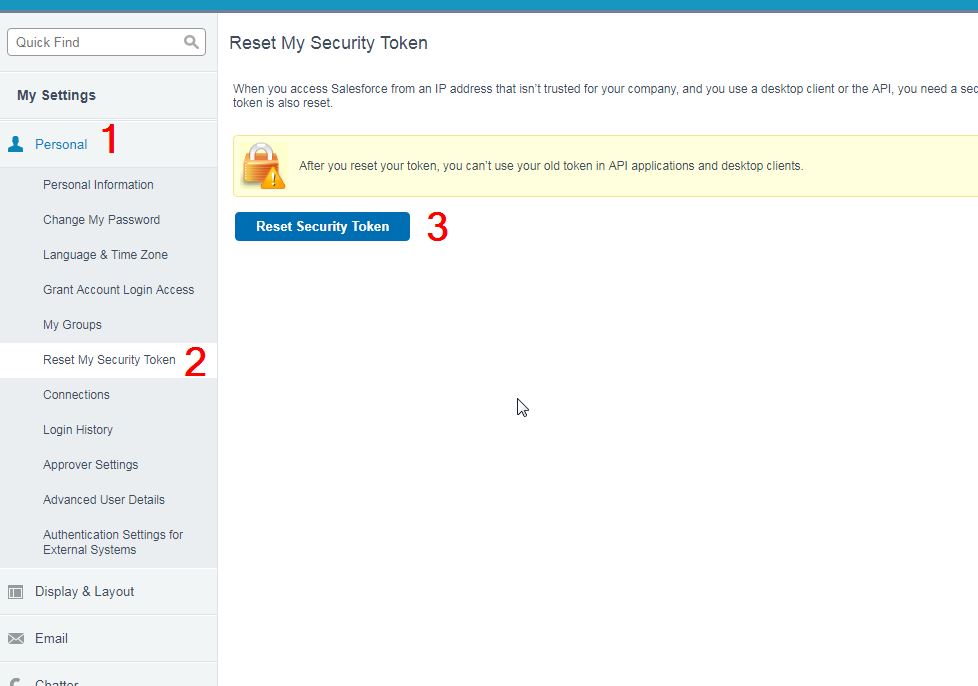
You are now finished creating your account! The login, security token and password will be used in Stambia.
Next step is to configure the Metadata in Stambia.
This article will demonstrate how to setup your Salesforce environnement in order to perform the second part of the demonstration project and learn more about Salesforce.
Create a custom object in Salesforce
Before we start manipulating objects, here is a reminder of Salesforce's difference between standard objects and custom objects:
Standard Objects—These are objects included with Salesforce, by default, for example the objects used to store data in standard tabs such as accounts, contacts, or opportunities.
Custom Objects—These are new objects you create to store information unique to your organization. Custom objects extend the functionality that standard objects provide.
We are going to create a custom object. First, log into your salesforce account and go to the setup page.
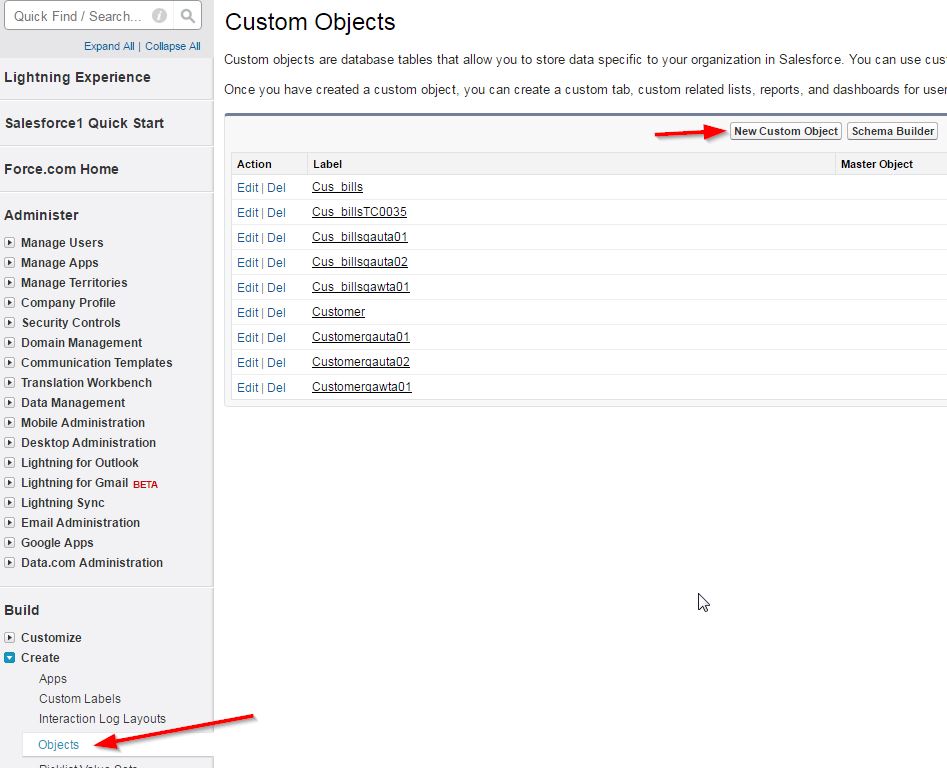
Click on 'New Custom Object'. We are going to create the 't_customer' custom object, for the purpose of the demonstration project.
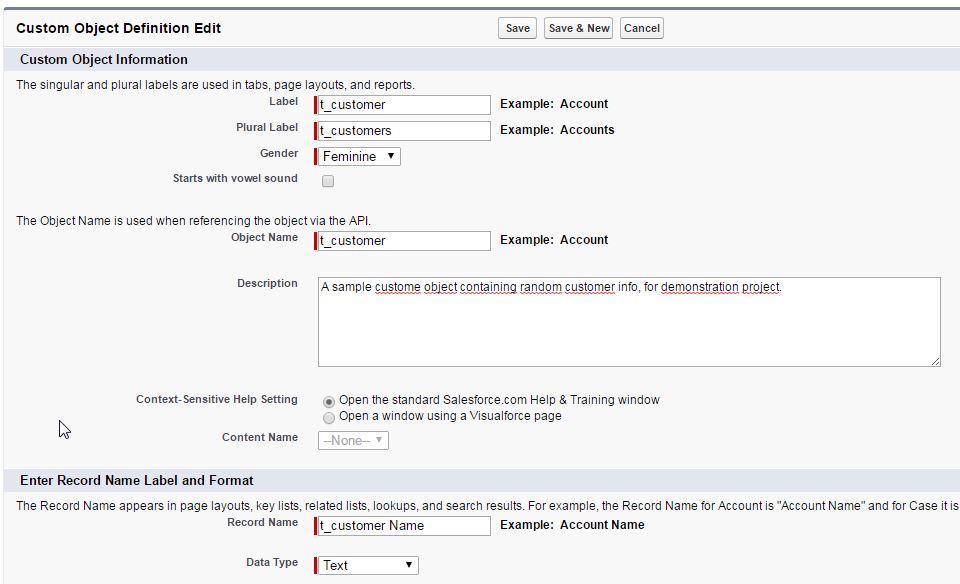
Enter Object information and Click 'save'
Now the object is empty, we will create custom fields. (standards objects can have custom fields too).
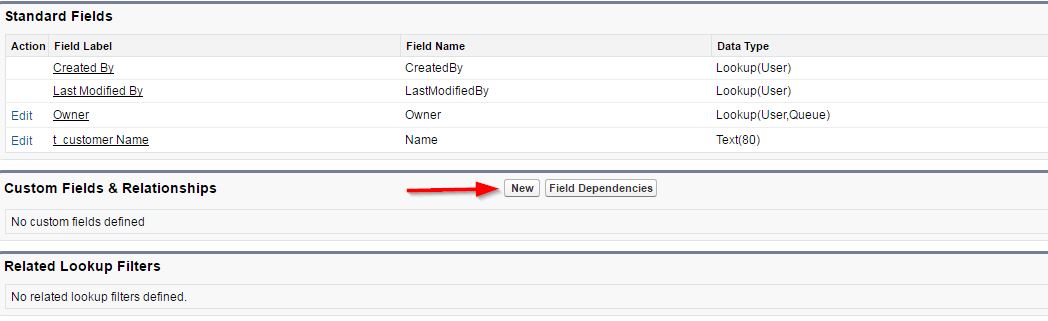
Click on 'New' to create a custom field. The first field to create is 'Cus_id' which is a number.
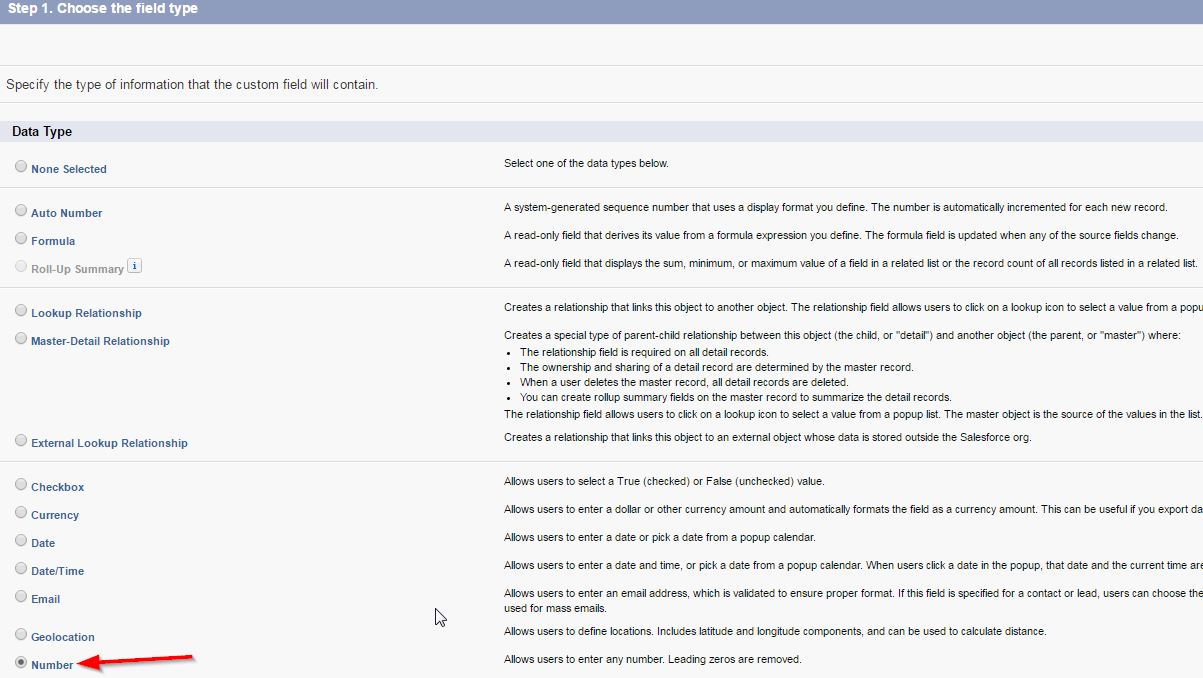
Click 'Next'.
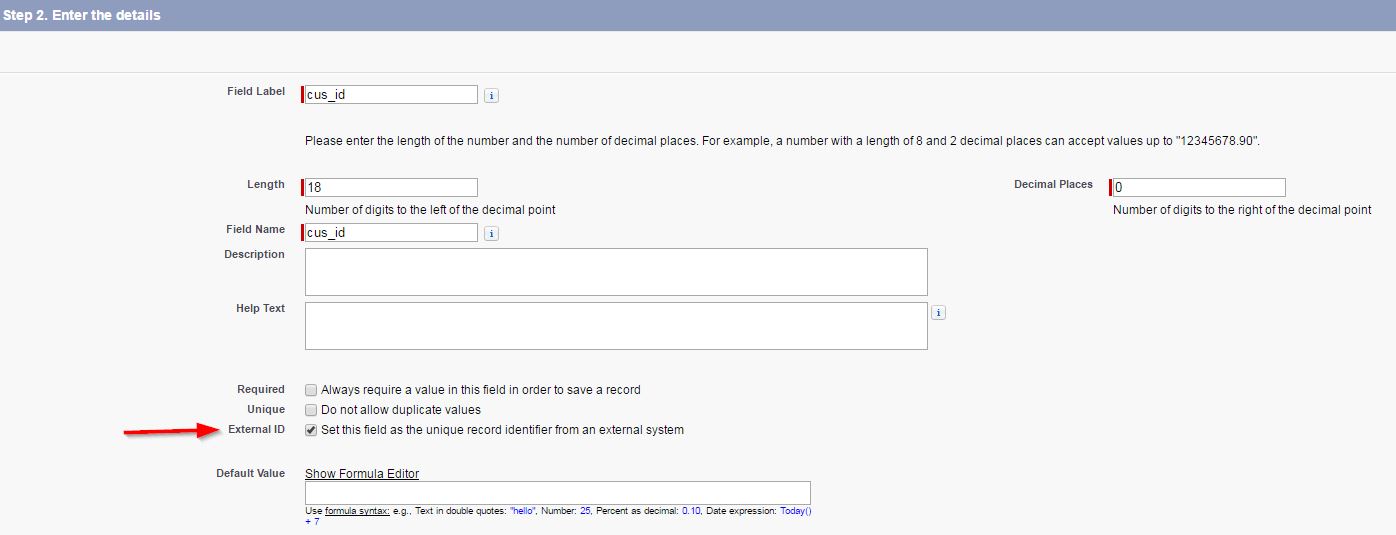
For this field, we select the External ID attribute. An external ID is a custom field that has the External ID attribute, which means that it contains unique record identifiers from a system outside of Salesforce. It is also known as a primary key.
Go through the two next steps by just clicking on next, as we do not need to change anything. Finaly, save the field.
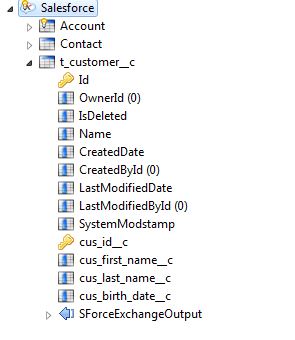
Create the other fields, and you shoud have something like this :

Note : The cus_id field is indexed. This is due to the external id attribute.
We are done creating our custom object !
You can now reverse its structure in Stambia.
Go back to your Salesforce metadata, and perform a reverse on the Salesforce server.
The object t_customer__c should appear.
The object can now be used in Stambia !
Create tabs for your custom objects
In the salesforce environnement, a tab allows you to read data from your custom objects and more.
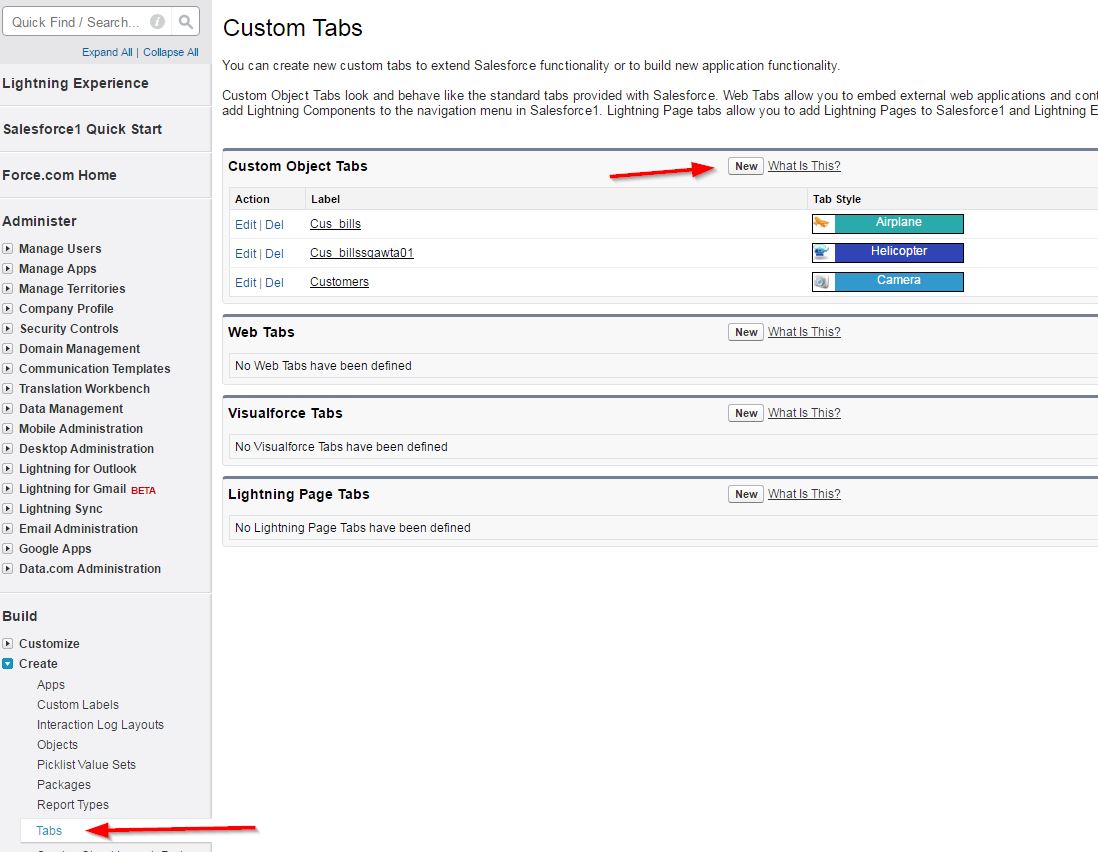
To create a tab, go into your setup page.
Select your custom object in the list and a tab style (anyone), and click next.
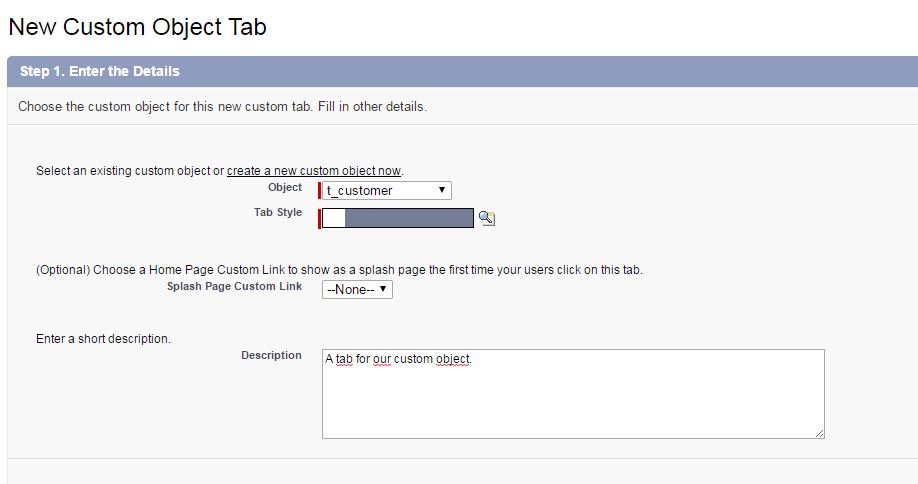
Go through the following steps by just clicking next and save your tab.
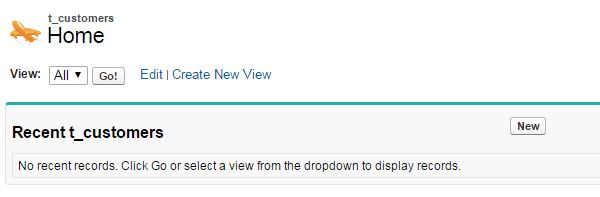
You should now see your tab in the menu bar :

From this tab, you can either consult your data (click 'Go!' ) or enter new records by clicking 'New'.
More about Stambia's Integration template Rdbms to Salesforce
The parameter "Error Acceptance Number" can be usefull when your Salesforce object has a custom field with a validation rule. You can change its value to allow a number of records to go through the rule. The value -1 means the rule will be ignored.
Tip : Salesforce records have a unique ID with which you can access its information through the following url : https://yourInstance.salesforce.com/<ID>