Welcome Guest! Log in
Stambia versions 2.x, 3.x, S17, S18, S19 and S20 are reaching End of Support January, 15th, 2024. Please consider upgrading to the supported Semarchy xDI versions. See Global Policy Support and the Semarchy Documentation.

The Stambia User Community is moving to Semarchy! All the applicable resources have already been moved or are currently being moved to their new location. Read more…

How to attach files to Salesforce records


    Prerequisites:

    • Stambia DI Designer S19.0.18 or higher


    Salesforce has a data object that stores all the files that are attached to the Salesforce records. The object is called Attachements.

    You will find the description of each field of this object in the documentation below:

    https://developer.salesforce.com/docs/atlas.en-us.api.meta/api/sforce_api_objects_attachment.htm


    You can therefore quite easily upload a file using Stambia to Salesforce, by inserting a row into this object. The file has to be inserted in base64 binary format in the field Body.

    As you can see in the documentation the minimum mandatory fields that you need to map are:

    ParentId - id of the parent of the parent object of the attachement 

    Body - base64 binary content of the attached file

    Name - name of the attachement

    Example:

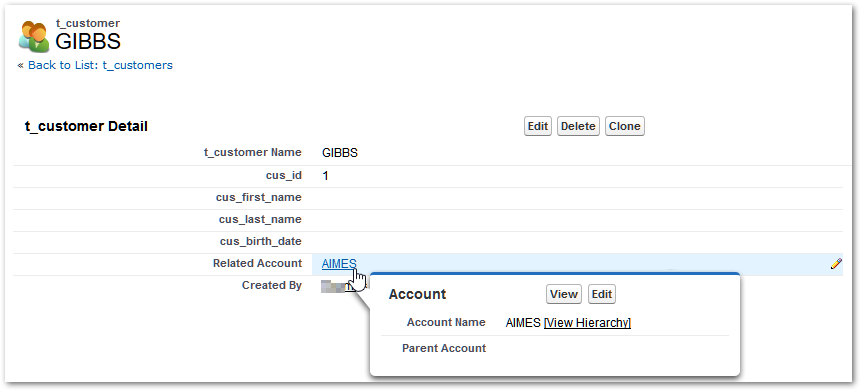
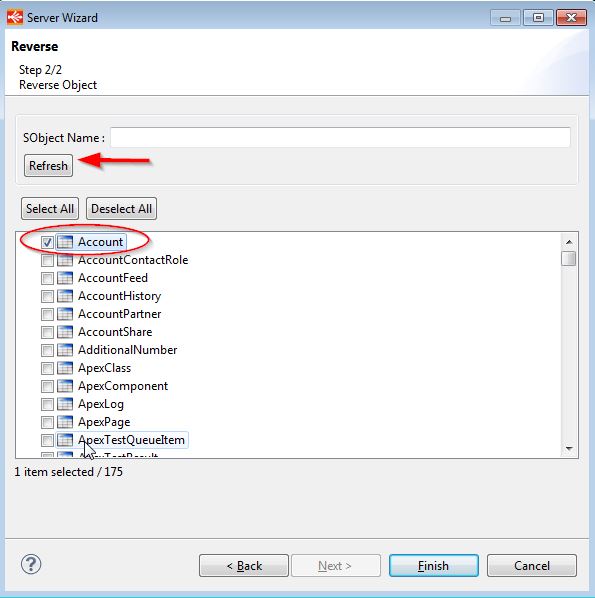
    To attach a file to Account record first you need to reverse the Attachement object.

    Then you need to prepare a mapping that will insert the file. 

    We will use a metadata File pointing to a pdf file that we want to upload:

     1

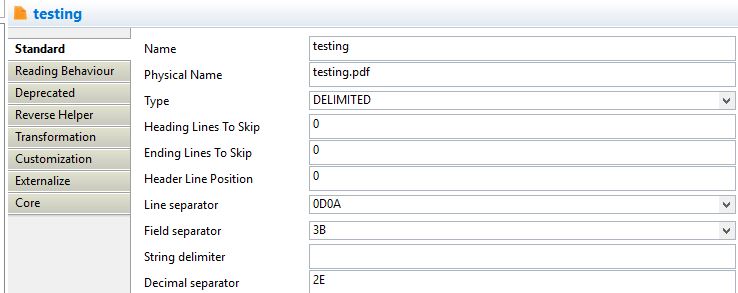
    We will be using a "binary_content" property field to get the base64 binary content and "file_name" property field to get the name of the file.

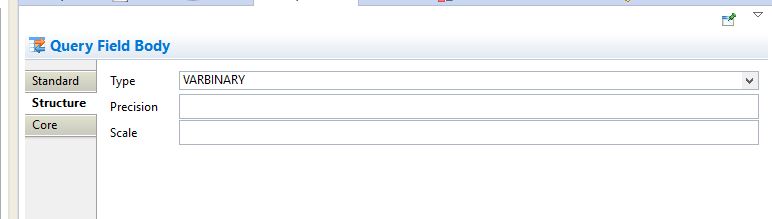
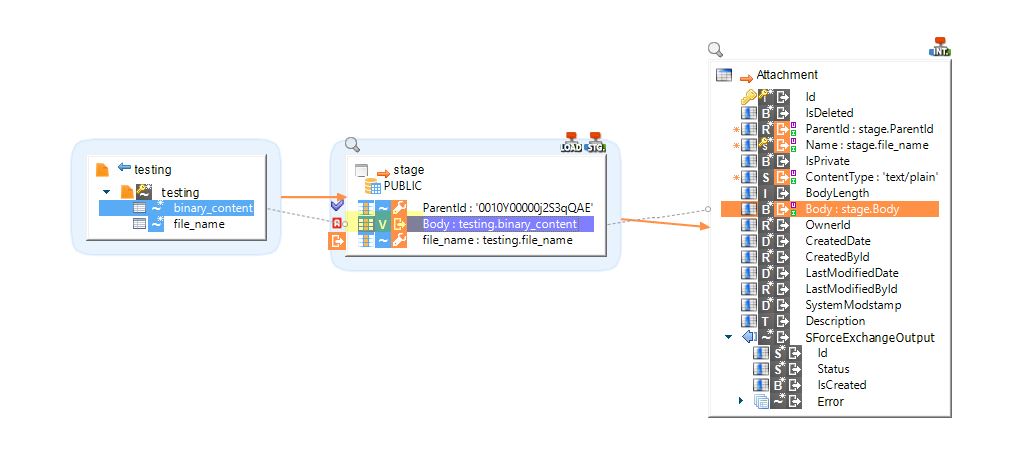
    We have to load the binary content into a binary field in a stage (note we have activated "Enable datatype" option on the stage with datatype VARBINARY as by default the field "binary_content" would be loaded as a string in the stage):

     3

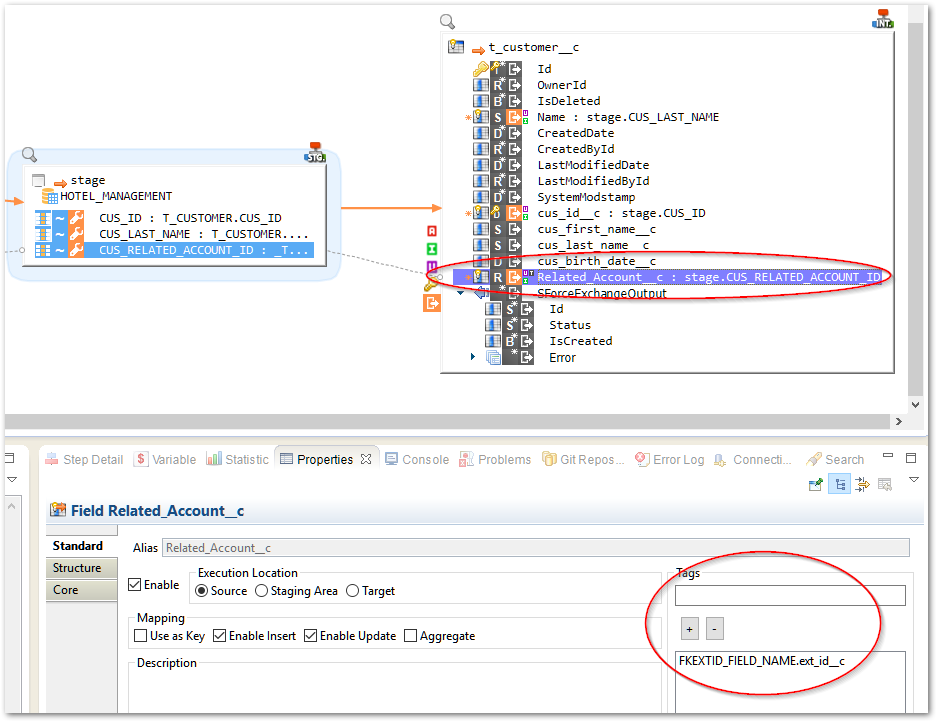
    We will map the content of this field to the "Body" element of the "Attachement" Salesforce object and other fields to indicate the Id of parent record, name etc.

    2 2

    Executing this mapping uploads the file testing.pdf and attaches it to the record indicated by ParentID.

    4 

    Working with Salesforce Relations

      Salesforce objects can have Relations between them.

      When creating / updating Salesforce objects with Stambia, the relation can be done with a Salesforce ID - when it is known, but it can be useful to provide an ExternalId when sending data to Salesforce.


      In this example, we added a "Related_Account" field to the "t_customer" object. It is a "Lookup" field and relates to the Account object.

      516 Related Account


      The reversed metadata for the "t_customer" object is:

      516 Metadata


      In this example, the Account object is also customized: it contains a custom "ext_id" field which is declared as en ExternalId in Salesforce:

      516 Account

      516 Account Data


      So, now we want to send "t_customer" data, providing an ext_id (values in 24, 27, 97... not the Salesforce Internal Id).

      To to this, simply add the following tag to the "Related_Account__c" mapping field: FKEXTID_FIELD_NAME.ext_id__c

      516 Mapping

      The tag is formed of a constant prefix "FKEXTID_FIELD_NAME." followed by the API name of the External Id field in the related Object.


      Your object doesn't have an External Id?
      If your object relation is based on the Salesforce ID (not a custom External Id), then no need to add the tag : Salesforce will match the value with the Master object's Id.


      As a result, the uploaded Salesforce object is created / udpated with the expected Relation to the Account object:

       516 result

      Configure the Metadata

        This article will explain how to configure a Salesforce Metadata in Stambia Designer.

        You will need a Salesforce account, with a login, password and security token. If you do not have already one, please read this article.

        Configuration

        In Stambia Designer, open or create a salesforce Metadata.

        metadatalist


        Open the server wizard of this metadata. (Open the metadata, right click on "Salesforce" -> Actions -> Launch Server Wizard.)

        Fill in your security token, password and username. Then click on connect.

        salesforceServerWizard

        You should get the following message:

        2017 07 17 09 26 34 Stambia Demonstration SaleForce 01 Metadata MySalesforceAccount.md Stamb

        Next step is to reverse the Salesforce objects. Click on Refresh and check "Account". Then click on finish.

        2017 07 17 09 27 28 Server Wizard

        Save your metadata.

        metadataReversed

        The configuration is now finished.

        You are ready to use your Salesforce objects in Stambia, and execute the examples of the Salesforce Demonstration Project.


        Articles

        Suggest a new Article!