As explained in the presentation article, Stambia can perform operations on Google Sheets such as reading or writing data into Google Sheets.
To accomplish this, you'll first have to install the dedicated Component and prepare your environment.
You can find below all the explanations and instructions to install and set up everything to get ready to work with Google Sheets.
This article is dedicated to Stambia DI S17, S18, S19.
if you are using Stambia DI 2020 (S20.x.x) or higher, please refer to this article.
Prerequisites
This article explains how to work with latest Google Sheet Component, which supports Google "v4 API":
- Google Sheet Plugin 1.0.0 or higher (Stambia DI S17, S18, S19)
If you are using a prior version, we highly suggest to migrate to the new Component as previous versions were using Google "v3 API" which is getting removed by Google.
Prior versions will therefore stop working when Google will remove the "v3 API".
Refer to the following migration article which explain how to migrate.
Component Installation
Installation
You must install Google Sheet Component to be able to work with those technologies in Stambia DI.
You can find Components download section and installation procedure at this location.
Follow installation instruction corresponding to the version you are using.
SQL Explorer JDBC Driver Configuration
Depending on Designer version you are using and from which you created your workspace, you may need to manually add the Google Sheet JDBC entry in SQL Explorer Preferences.
To check if it is already present and add it if not, you can proceed as follow.
Open the following menu and look for the "Google Spreadsheet Driver": Window > Preferences > SQL Explorer > JDBC Drivers
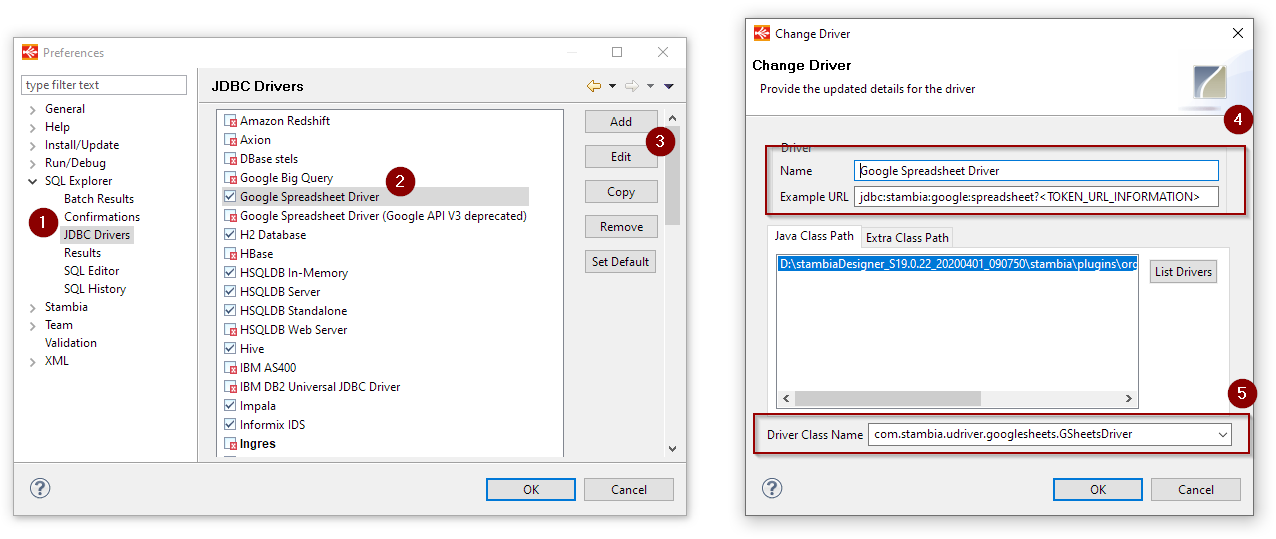
Note that if you are on an existing workspace, and / or if you are on a prior version than S19.0.22, the driver will not be listed, and you will have to add it manually.
For this, click on the "Add" button, which will display a window to create a new driver.
Then define the properties as follow:
| Property | Value |
| Name | Google Spreadsheet Driver |
| Example URL | jdbc:stambia:google:spreadsheet?<TOKEN_URL_INFORMATION> |
| Driver Class Name | com.stambia.udriver.googlesheets.GSheetsDriver |
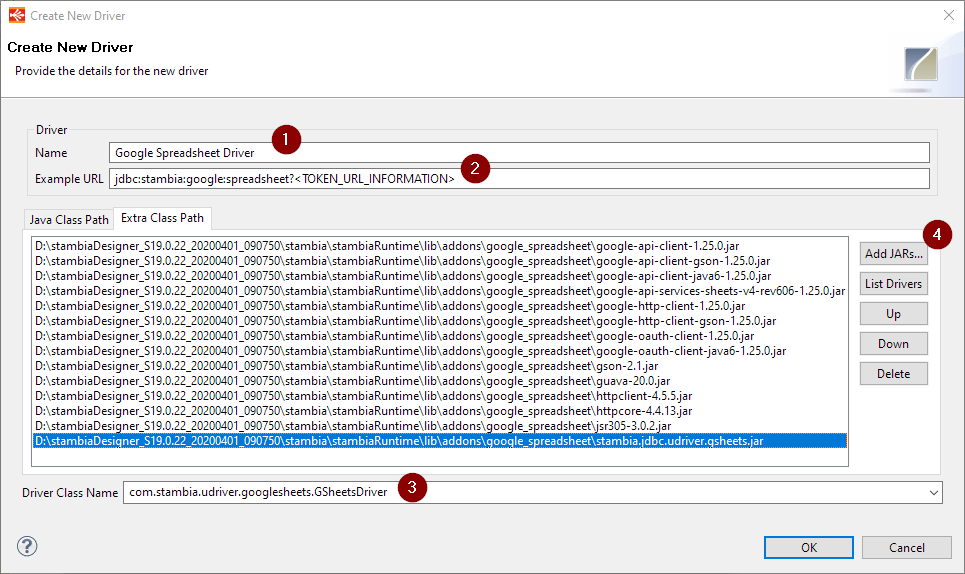
Finally, in "Extra Class Path" tab, you need to add all the libraries which have been generated by the Component, by clicking on "Add JARs..." button.
They are generated at the following location:
<Designer Installation Folder>/stambiaRuntime/lib/addons/google_spreadsheet
Getting necessary token to communicate with Google Sheets
When Stambia DI Google Cloud Sheet Component is installed and configured, before going further and creating your first Google Sheet Metadata, you'll need to configure your Google Project and generate a token for Stambia Component to be able to communicate with Google Sheets.
You can refer to the following article which explains how to perform that.
Metadata definition
You have now installed Google Sheet Component and retrieved the token information.
You can therefore start creating your first Google Sheet Metadata.
This Metadata is will be used to reverse the Google Sheets you want to perform operations on.
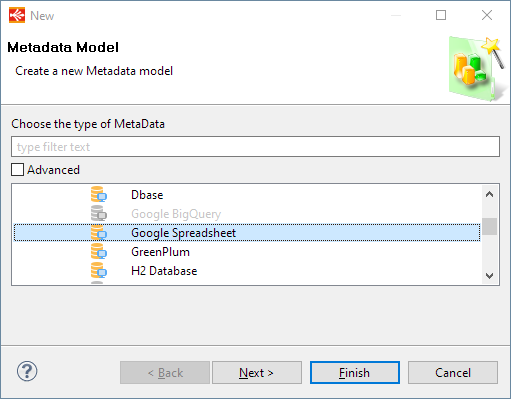
Metadata creation
Create the Metadata, as usual, by selecting the technology in the Metadata Creation Wizard:
Click next, choose a name, a Module, and click on finish.
Metadata Configuration
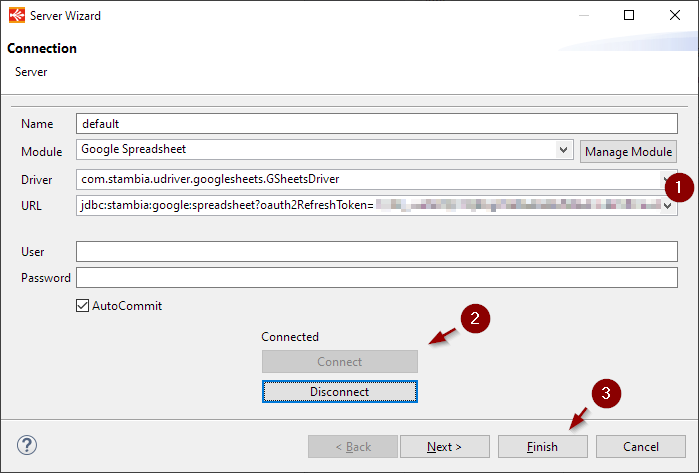
A new Wizard will open to define connection information.
This is where you will specify the JDBC URL with refresh token you previously generated.
Specify the JDBC URL, click on Connect, and then on Finish.
You are now ready to start reversing Google Sheets.
Reversing a Google Sheet
Google's "v4 API" does not allow to retrieve all the sheets of a given user as it was possible before.
Impact of this is that we cannot reverse for now all Google Sheets of a given user at once, as we cannot list them from Google's "v4 API" as it was possible before.
We need for now to know the exact identifier of a Google Sheet to be able to perform operations on it.
To reverse a Google Sheet, first add a DataSchema, which will represent a Google Sheet, and define a label on it:

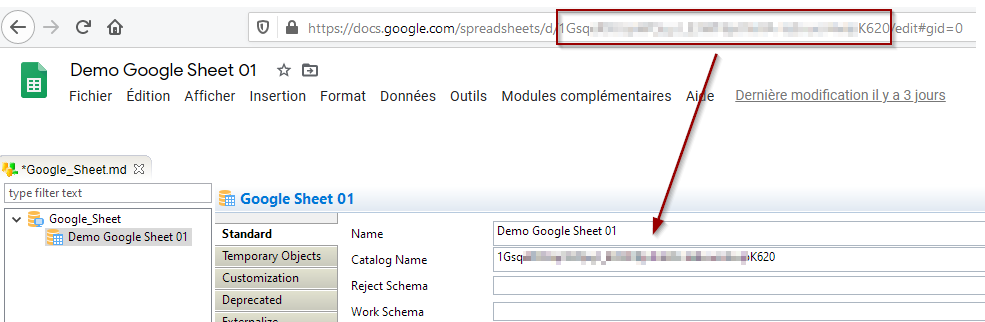
Then, you have to put the identifier of the Google Sheet you want to access in the "Physical Name".
The Spreadsheet Identifier can be extracted from its URL.
This ID is the value between the "/d/" and the "/edit" parts of the URL.
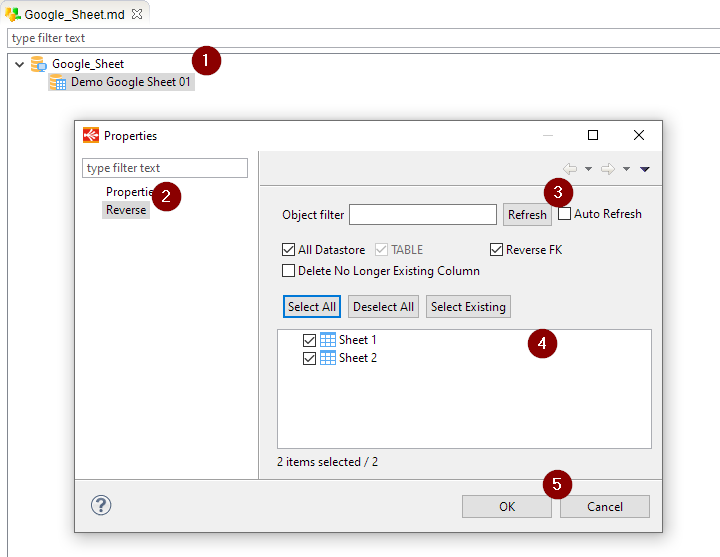
Finally, you can right click on the schema, choose Actions > Properties.
Then you can go to the "Reverse" tab to reverse this Google Sheet
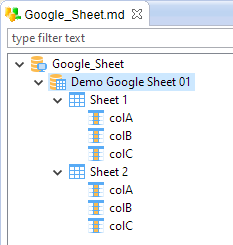
The Google Sheet is now reversed:
Reading a Google Sheet in a mapping
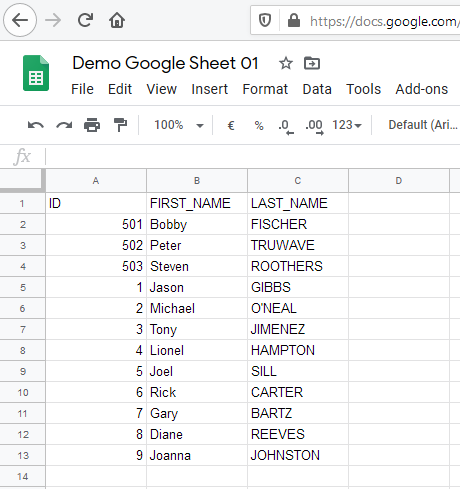
Example of Google Sheet source data
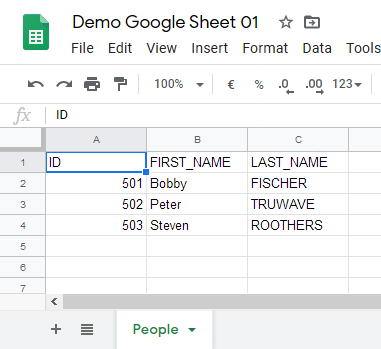
We created a Google Sheet with the following data.
The sheet tab is named "People".
| ID | FIRST_NAME | LAST_NAME |
| 501 | Bobby | FISCHER |
| 502 | Peter | TRUWAVE |
| 503 | Steven | ROOTHERS |
Here is a screenshot of the Google Sheet:
Reading data from Mapping
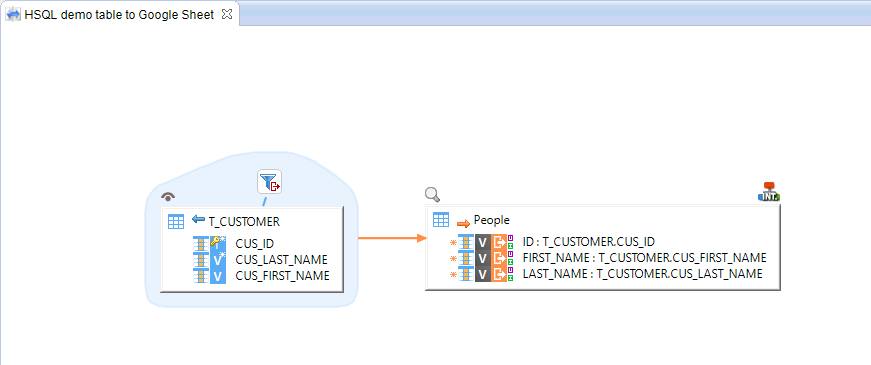
Reading data from Google Sheet in a Mapping is no different than any other Mapping.
Drag and drop the Google Sheet datastore on the Mapping and map the fields on a target datastore.
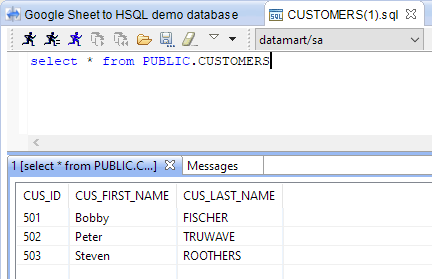
In the following example, the Mapping reads data from the Google Sheet, and populates a table in HSQL demo database.

The execution populates the target table with the three rows of data in target table:
Writing to a Google Sheet
Now, we are going to add content to our Google Sheet, from the Hotel Demo Database.
Same as for reading, this is a simple Mapping working as usual.
Drag and drop the sources from which to load data into Google Sheet and the target Google Sheet, then map the fields.
And this is the data written to the Google Sheet: