

In this article
You can find below the major changes and improvements of Stambia DI Designer 2020 (S20.1.x) version.
This article only highlights the most important changes.
If you need further information, please consult the full changelog and/or reference documentation.
Prerequisites
Migration from S17, S18, S19
Stambia DI 2020 (S20) major version changes some important part of the software which require your attention.
Migrating from Stambia DI Designer S17, S18 or S19 require to follow the migration guide, which can be found in the following article.
If you are simply updating from another Stambia DI 2020 (S20) version, simply follow the minor version upgrade guide, as usual.
What's new on Stambia DI Designer 2020 (S20.1.0)
Ability to define transparent staging area on a target datastore
In Mappings, when working with two datastore which does not have transformation capabilities, such as having a JSON file as source and a JSON file as target, it was required to define between them a stage or a table to process data.
This version adds a new mechanism to avoid having to design this temporary stage / table between them, by simply selecting on the target datastore the staging area where the stage can be done.
Everything will then be handled automatically to create transparently the necessary staging objects to process data.
This offers the ability to provide transformation capabilities on technologies which have not, such as XML, or JSON, on which, by defining a staging area, you'll be able to benefit of all the transformation capabilities of the underlying staging technology.
Moreover, this avoids to design manually in Mapping the stages in those situations, which will be handled automatically behind the scenes.
To define a transparent staging area on a target datastore, simply click on the following button when applicable:
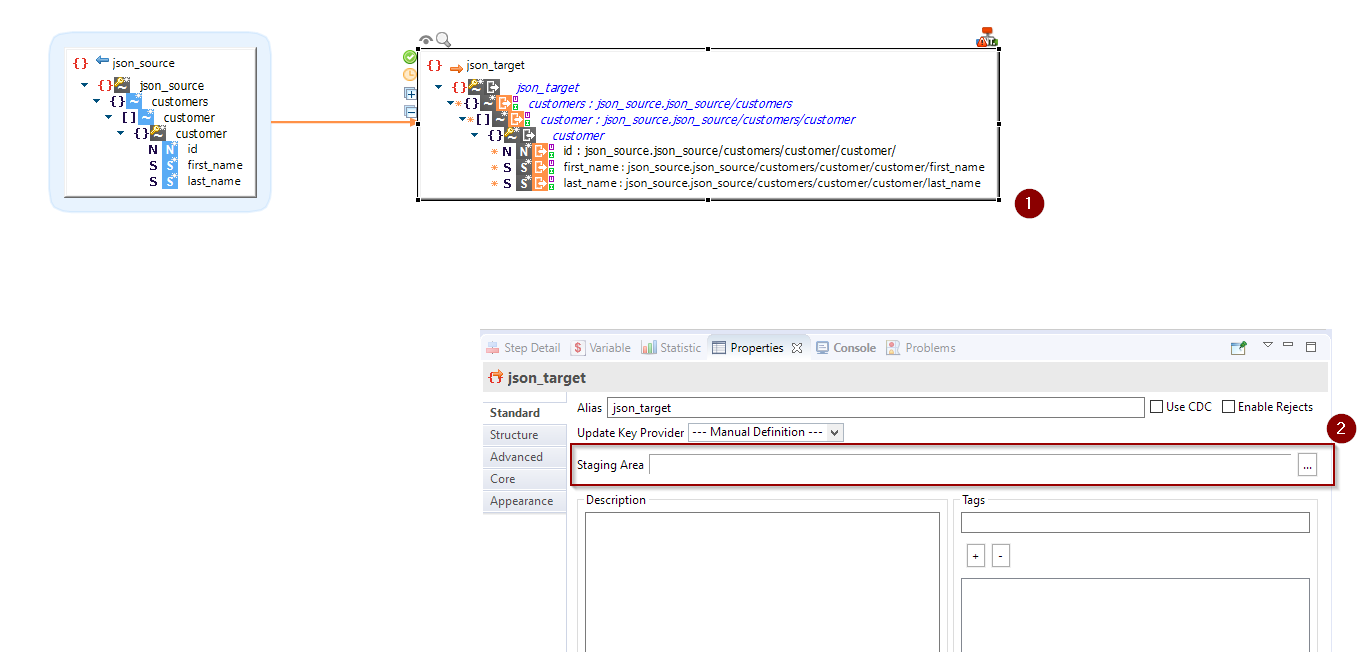
This will open a window to select the staging area you want to use:

That's it, you'll see a "Load" step appear automatically on the target datastore, as well as the staging area in which data will be retrieved.
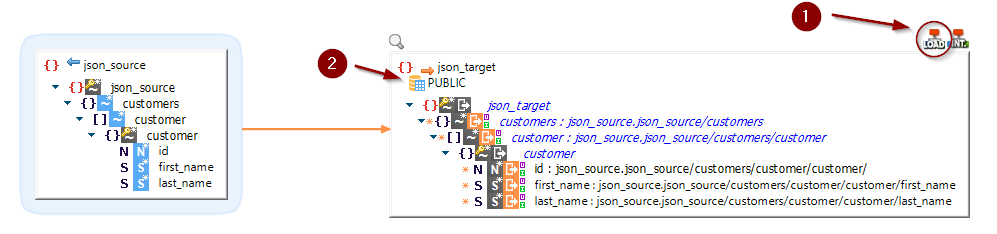
You can now benefit of the staging are transformation capabilities if needed.
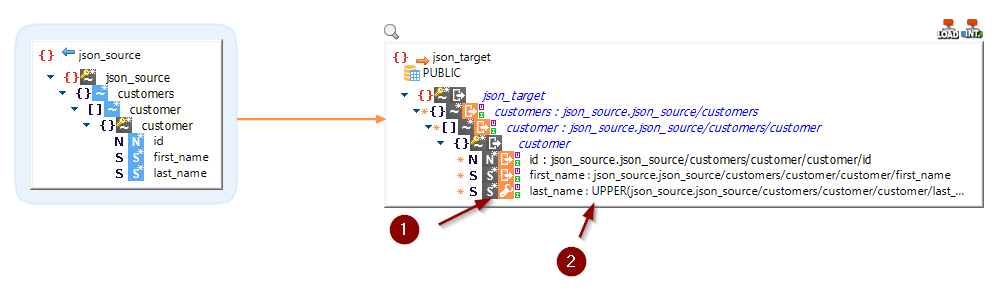
For instance, if you want to use some SQL functions available on the defined staging area, simply change the "Execute Location" location of your field to "staging area" and then you can use all the functions existing on the staging area defined.
As an example, here we use the 'UPPER' SQL function when having a JSON to JSON Mapping.
HTTP REST Metadata
HTTP REST APIs were previously designed and invoked through the legacy web services Metadata which works for SOAP and REST web services.
We decided to add a new, fresh Metadata completely dedicated to HTTP REST APIs, to offer a better experience which matches the most how HTTP REST APIs are defined as of today.
This new Metadata will now be the privileged one to perform HTTP REST APIs operations.
The Metadata structure and definition looks like this:
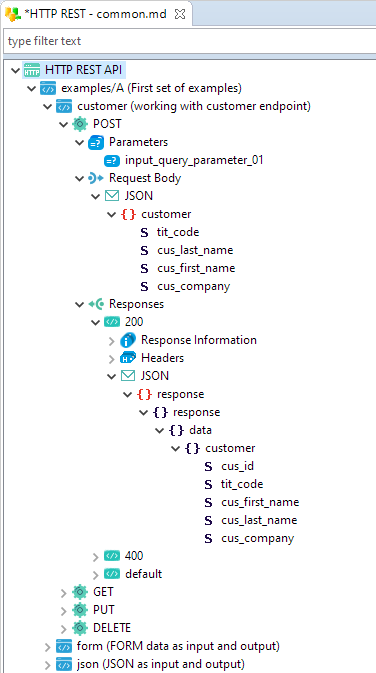
A bunch of examples is available inside the HTTP REST Sample Project shipped within the Component.
You can import the Sample Project to see how the different nodes are structured and how to use them.
You can consult this article to learn how to import the Sample Projects available in the Designer.
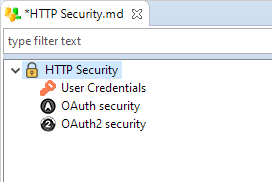
HTTP Security Metadata
The new HTTP REST Metadata presented previously supports standard authentication such as Basic authentication, OAuth, or Auth2.
This security information are defined in a new dedicated Metadata called "HTTP Security" in which you can define the security information.
Then in your HTTP REST Metadata you'll simply have to reference the security node to be used for authentication.
This allows to centralize the different security information in one dedicated Metadata.
The Metadata looks like this:
Usability improvements
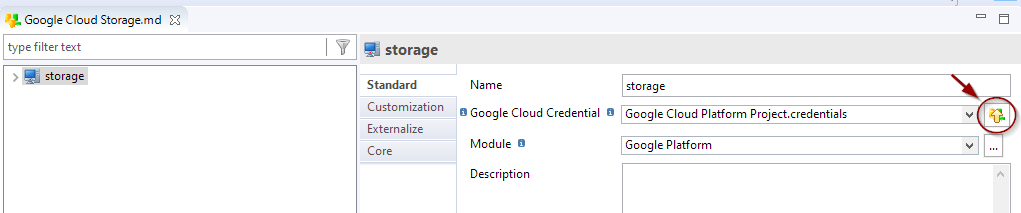
Open referenced Metadata
Metadata having reference attributes now have a button to open the Metadata referenced in the attributes.
This allows to easily access with one click the referenced Metadata.
New button to access referenced Metadata
References between Metadata
A new mechanism has been introduced to be able to propose, for reference attributes, the list of applicable references from the current workspace.
For instance, on HTTP REST Metadata, the security is defined in a dedicated HTTP Security Metadata.
Then, in the HTTP REST Metadata, you automatically have the list of authentication nodes available in the current workspace:
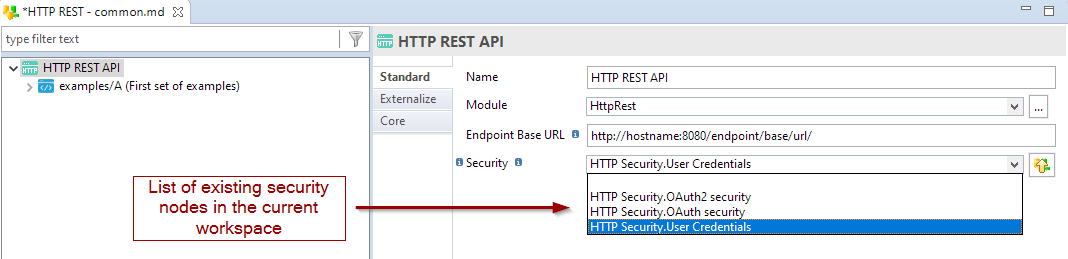
We'll start using this mechanism on all applicable Metadata, when there are references between different Metadata.
Proposing automatically available nodes will help to configure more easily such Metadata.
Note that you can still drag and drop the node on the field directly from Project Explorer, as it was possible before.
File selector button on path attributes
When working with path attributes in Metadata, a button is now displayed near the attributes, which allows to open a popup to select a file / a path from the local file system.
For now, this button has been added on applicable path attributes on XML, JSON, BSON, and File Metadata.
On those Metadata, when you need to configure a file with its path, you can optionally click on this button to define the path from local file system.
Example on an XML Metadata:

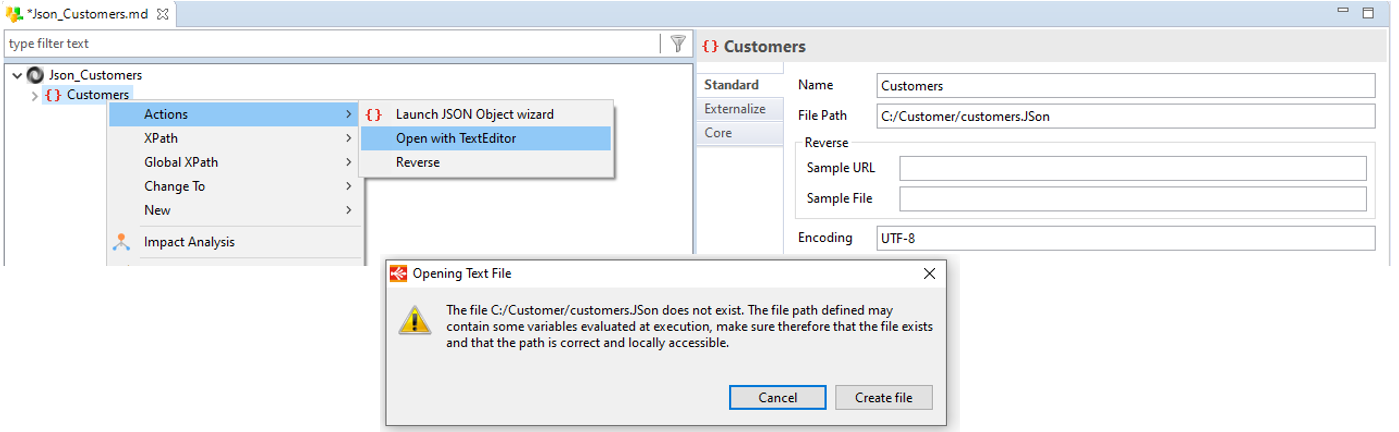
Popup to propose creating the file for JSON and XML Metadata
When performing a "right click > Open with TextEditor" on a node inside a JSON or XML Metadata, it now proposes to create the JSON or XML file if it does not exist on local file system.
This can be useful when working locally to be able to easily create and access the file within the Designer when it does not exist when trying to access it.
Note that it is designed to be used for quick file creation when working with locally accessible file paths.
If you are using variables such as session variables which are evaluated at execution, they will not be evaluated and the file will tried to be created with the path as is.
Example of file creation proposition:
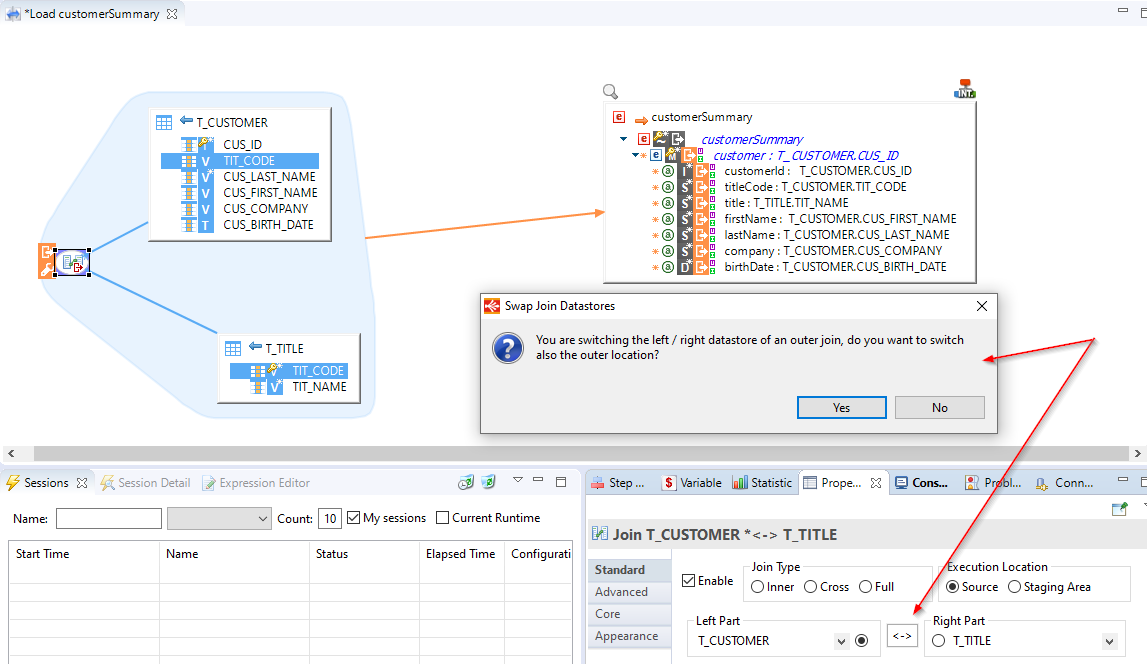
Popup proposing to change outer location of join
When you are using the button to inverse the datastores specified on the left / right part of a join, a popup will now open to propose changing also the outer location.
When clicking on "Yes", the datastores specified on the left / right part will be switched, and the outer location will be also switched.
When clicking on "No", only the datastores specified on the left / right part will be switched (default behavior before this improvement).
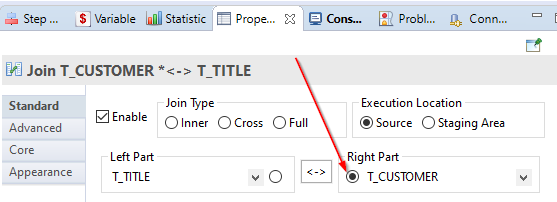
Example, clicking on the switch button:
When clicking on "Yes", it also switches the outer location in addition of the left / right part
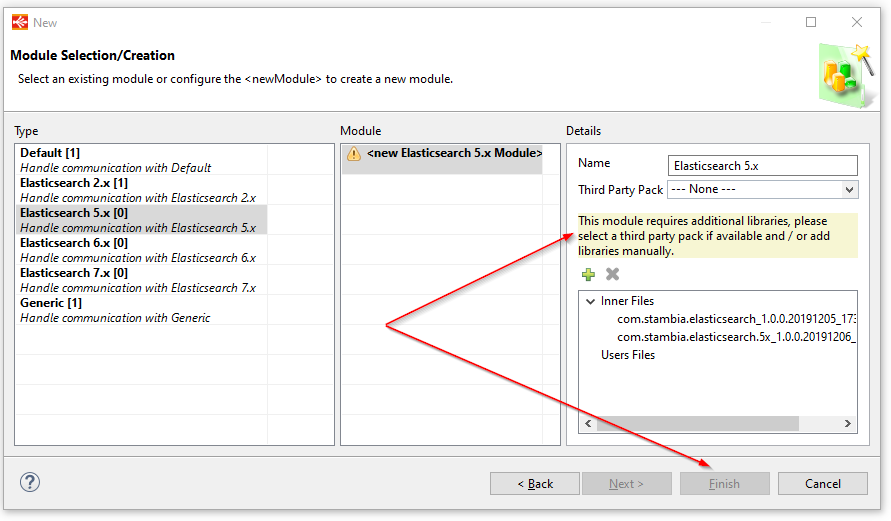
Module Selection Wizard
To improve your experience with Modules and avoid mistakes, when you select a module with a warning state, the Finish button is no longer activated.
This avoids to create or select a Module which is uncomplete and which will therefore cause issues later when trying to use it.
The wizard will now allow to Finish only on Modules which are not in warning state.
As a reminder, this warning state indicates that the Module is uncomplete, and that it requires additional libraries, which you can add by selecting a third party pack, when available, or adding manually the libraries dependencies.
Refer to Getting started with Modules guide for further information about Modules.
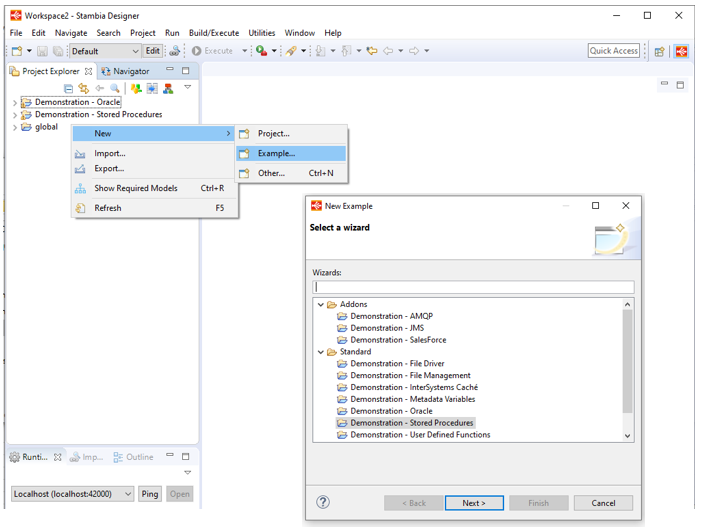
Sample Projects creation from New Project menu
A Component may contain Sample Projects to demonstrate its usage with Metadata, Mapping and Process examples.
When installing a Component in Stambia DI Designer, Sample Projects which are shipped within are available automatically, and can be imported from Welcome Page.
From now, you can also access Sample Projects through the "New" menu in Project Explorer.
Right click in Project Explorer, then choose New > Example or New > Project > Examples
Bug fixes
This version fixes a list of issues which can be found on the full changelog.
Do not hesitate to take a look at it to have an idea of what have changed.