

In this article, you will find the steps to migrate from Stambia DI Designer S18 / S19 versions to 2020 (S20).
The whole procedure is described with additional notes and information about the major modifications you should have in mind.
The migration procedure will guide you to migrate to the new version and also explains the first step to follow after the migration is done.
There are dedicated articles for migration and upgrade procedure for the different major versions.
There are all summarized in the following article.
Do not hesitate to have a look at it.
You want to know what have changed in Stambia DI Designer 2020 (S20) major version?
You can have a look at the following release notes!
About migration
This article is dedicated to the migration from Stambia DI Designer S18 / S19 versions to 2020 (S20).
When you are coming from Stambia DI Designer S17, you must first migrate to S18 / S19 and then upgrade to 2020 (S20).
There are major differences between those which are easier to understand step by step, that's why we advise to do this migration in two steps when coming from S17.
Moreover, if you are simply doing a minor version upgrade, please refer to the corresponding article which will guide you to do it.
All migration / upgrade articles are summarized in the following article.
Prerequisites
From Stambia DI S20 and higher, Java 8 or Java 11 is required to run the application.
Migration procedure
Here are the steps to follow to migrate Stambia DI Designer to 2020 (S20).
Preparation
The first step is to prepare your old Designer and Workspace:
- Stop the local Runtime if it is running
- Close all the editors (mappings, processes, metadata, SQL Editors...)
- Exit Stambia Designer
Backup
Next, back up all your work to avoid any loss in case of migration problem:
- Make a zip archive of your existing Stambia Designer installation
- Make a zip archive of your workspace(s)
Installation - Stambia DI Designer
Once everything is closed, stopped, and has been backed up, you are ready to install the new version:
- Download the new version of Stambia Designer
- Unzip this new version in a new directory
- Start the new Designer and select your workspace directory
- Launch a "Rebuild Cache" operation from the Impact view's menu
- Re-install your Versioning System's plugins, if you had any
Installation - Components
From Stambia DI S20, Components are autonomous and include everything about the corresponding technology.
Installing a Component will install all the resources required such as Technologies, Templates, Modules, Sample Projects and Documentation.
From this version you do not have any more to download and import multiple resources, they are all included in the corresponding Component.
Installing Elasticsearch Component, as an example, will install automatically all the Elasticsearch resources, such as Elasticsearch Technology, Elasticsearch Templates, Elasticsearch Third Party libraries, Sample Projects, and more...
The new Component installation procedure can be found in this dedicated article.
Important note about Templates
Once you have installed the Components you want to use from the previous link, there is one point that we would like to draw your attention.
As indicated in Component installation article, Templates are now already included and installed in Internal Resources of Stambia DI Designer, so you must NOT import Templates anymore in your workspace!
They are handled automatically through the Components and you should not have to take care about them anymore.
Most Templates have been updated to work with Stambia Designer 2020 (S20) new features, so previous Templates from S17 / S18 / S19 versions might not work properly.
You must remove the Templates you have in your workspace so that Stambia DI Designer will use instead the ones shipped inside its Components, which are compatible with 2020 (S20).
Unless you have modified some Templates that you would like to keep, you must remove all the Templates of your workspace.
For this simply delete them from your Project, they are usually imported in the "global" Project.
Installation - Modules
From Stambia DI 2020 (S20), Modules mechanism become the libraries management tool.
To put it in a nutshell, Modules will handle all what is necessary to communicate with a given technology.
When you want to use a technology, you need to communicate with them, and therefore in Java world to use some Java libraries files which contains what is necessary for this.
On previous versions you had to manually add most of the third party libraries such as JDBC Drivers and other Java libraries APIs to be able to communicate with a technology.
From now Stambia DI Designer will guide you to create Modules, which are placeholders for Java libraries.
When applicable, we shipped all what is required so that you can create a Module in a few clicks, as demonstrated in Modules getting started article.
Module mechanism is one of the new major features of Stambia DI 2020 (S20), which changes some of the habit about Metadata creation, configuration, and Java libraries management.
The idea is to have a compartmentalized set of libraries called a Module which can be used in several Metadata.
We strongly advise to read carefully the getting started with Modules article and this migration guide to be sure you understand this new concept.
More information can be found in reference documentation and getting started article.
Module usage Example
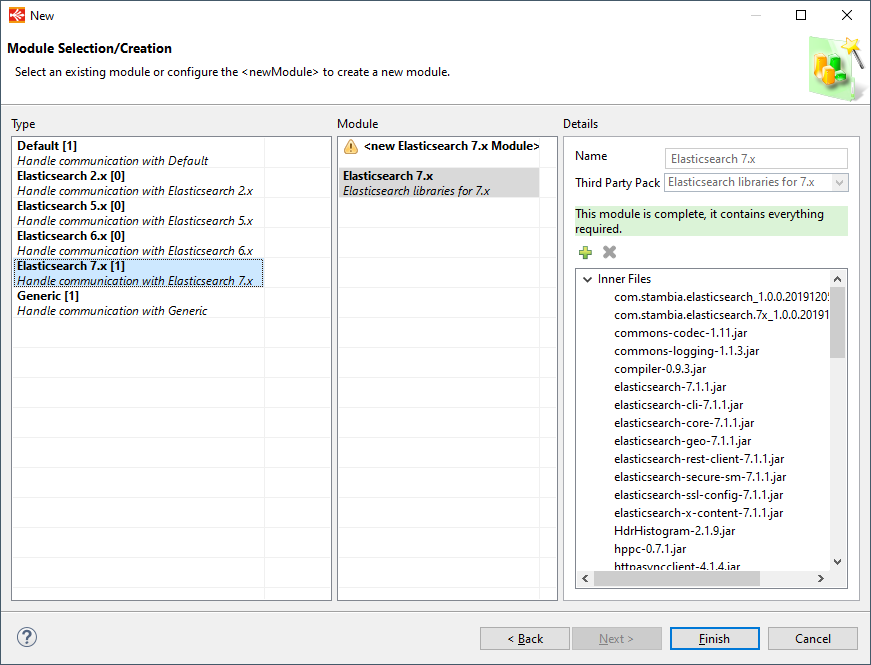
Modules are most of the time defined in Metadata.
When you create or modify a Metadata, you will have a step to select a Module the Metadata should use.
For instance, here, when creating an Elasticsearch Metadata:
Physically, Modules are stored inside <Stambia Runtime>/modules if you kept default location.
As a reminder, more information can be found in reference documentation and getting started article.
Migration from previous versions
On previous versions, all the libraries where copied under <Stambia Runtime>/lib folder.
From now, you should use Modules instead of manually copying libraries inside the Runtime.
Modules can be managed directly from Stambia DI Manager through the different wizards available.
Existing Metadata in your workspace will not have a Module defined yet, so you will have to update your Metadata to define a Module it should use.
For this, you can open your Metadata and define the Module on root node.
You can access the Modules wizard from there to select an existing Module if any, or create a new one.
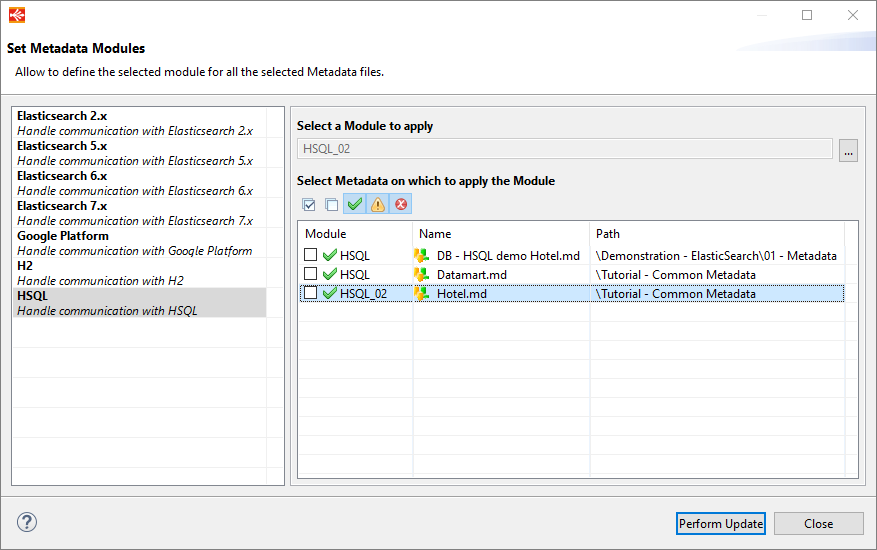
You can also use the Metadata Module Manager to manage the Modules used by all your Metadata and assign Modules in mass on them.
About "default" Module
We advise to start using the new Module mechanism as it is now an important part of Stambia DI for managing libraries.
Note however that you can also put all your existing libraries inside the Module called "default" which is a fallback Module used when no Module is specified in Metadata.
If you put all the libraries you were copy / pasting in lib folder in previous versions inside this "default" Module, your existing Mappings should work without having to define a Module in all your Metadata.
As indicated, this "default" Module is a fallback module which is used when no Module is specified, so it will be used for all your Metadata if you do not specify a Module in.
Note that using "default" Module will not work for the following Components which requires to create and use a Module explicitly:
Salesforce, MongoDB, Hadoop, Google Cloud Platform, Google BigQuery, Kafka, Elasticsearch, SAP or Excel.
About libraries management
Libraries now being specified through Modules, you must not use the "SQL Explorer / JDBC Drivers" Preferences anymore.
This preference is kept only for backward compatibility with some of the SQL Explorer View we are using.
There is nothing more to declare inside this View now.
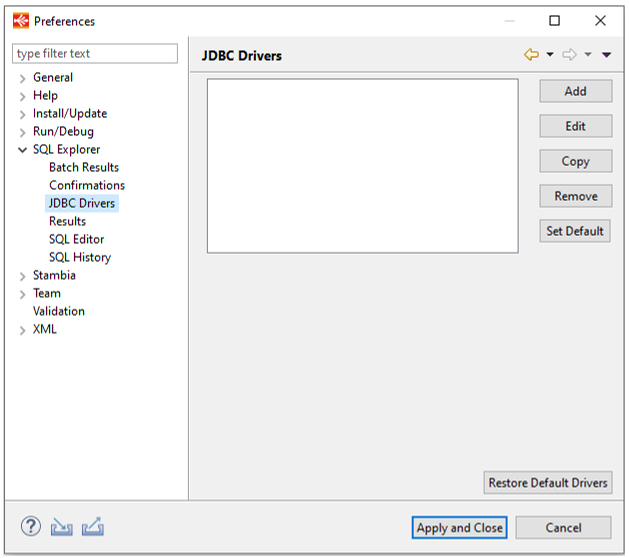
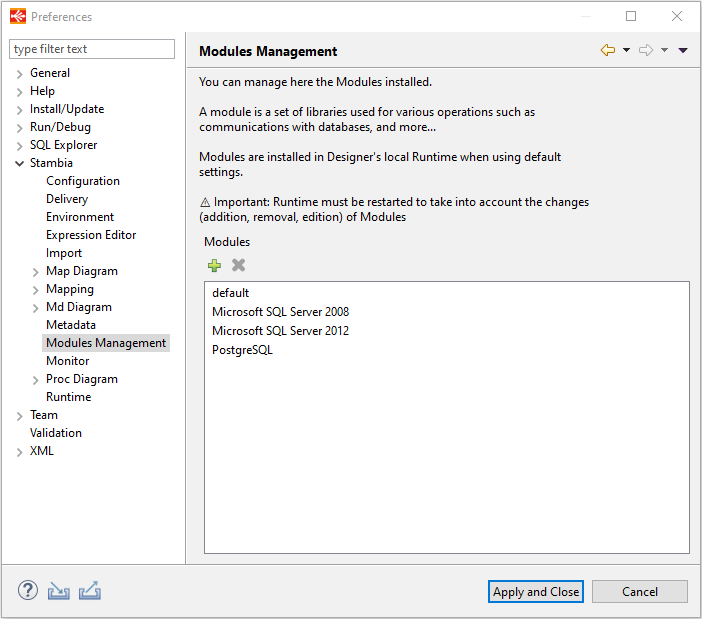
You must now use instead Modules Manager in Stambia Preferences.
You can also use the Metadata Module Manager to manage the Modules used by all your Metadata and assign Modules in mass on them.
Scripting Process Actions migration
You are using Scripting Process Actions in your Processes?
You may have to perform some update on your Processes or on your scripts.
If you were only using in your scripts the functions and objects supported by the scripting language itself, you do not have to change anything.
If you were using additional libraries in your scripts, for instance you added some additional libraries in the "lib" folder of the Runtime and you were using them in your scripts, please read carefully the following instructions.
All additional libraries now being managed through Modules, you may have to update your existing Scripting Process Actions or script to specify the Module from which to retrieve those additional libraries.
Refer to the following article which explains how to work with Modules in scripting.
Remember that when no Module is specified, the "default" module is used, which can be a workaround if you want to benefit of the libraries without having to define a Module.
RMIS Configuration
Designer does not anymore include the internal certificate used for communicating with Runtimes through RMIS.
This certificate has been removed as from Stambia DI Runtime 2020 you can customize it to use your own.
Therefore, when you want to connect to Runtimes through RMIS, you may now have to configure your Designer to specify the public certificate to be used.
Refer to this article to learn how to configure the clients such as Designer, Analytics, or command line scripts to communicate with a Runtime which endpoints are secured with TLS.
It also proposes as a separate download the internal public certificate which must be configured in the Designer if you want to connect from the Designer through RMIS on previous Runtimes which were using this internal certificate (Runtime S17.x.x).
Refer to this article to learn how to secure the various endpoints with TLS on Stambia DI Runtime 2020.
Upgrade Mapping Models
Mappings may sometimes need to be upgraded when upgrading Designer version.
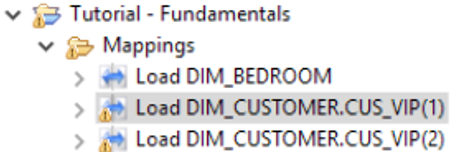
When the Mapping model is improved, a little warning appears on Mapping using the previous model version.
They will be upgraded automatically the next time they are saved, and working with Mappings from previous versions works well without any issue.
You can therefore leave them as is without necessarily upgrade them.
Refer to reference documentation for more information.
Post Migration Steps
Once you have finished following the migration guide, you can start using your fresh new Stambia DI Designer 2020 (S20)!
Refer to the release notes to discover all your new features!
After having checked that everything is OK, you can remove the old Designer's directory from your disk
You can check your Designer version in the menu Help / About Stambia Designer. The version number has this form: S99.9.9_YYYYMMDD_HHmmss.
Once a workspace has been opened with a newer version of Stambia Designer, do not try to re-open it with a previous version.
Troubleshooting
Common issues
If you encounter issues while performing the migration, double check you have followed properly all the steps, and make sure you had a look on the getting started articles related to this new version.
Most notably the Getting started with Modules article and Getting started with Components article.
Moreover, feel free to ask questions on the forum or to the Support Team.