

In this article
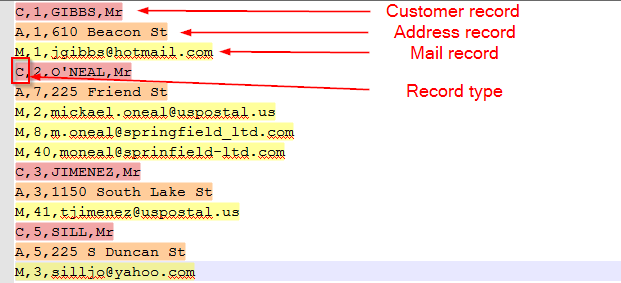
A hierarchical file is a file containing multiple records which can have different structures and can be nested.
Generally, these lines start with a "record type" field which helps recognizing each line type.
For example, a file storing Customers, their addresses and mails may look like this:
This article demonstrates how to handle this kind of files with Stambia DI.
Defining the Metadata
General structure
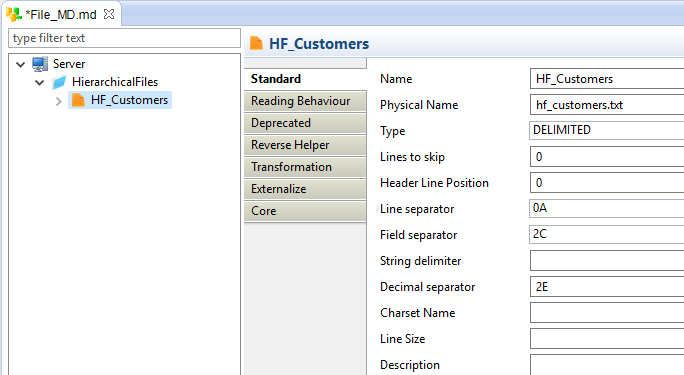
The first step is to create a File Server Metadata, and a directory in it.
Then add a file with New > File on it and configure its properties.
Example for our file which is a DELIMITED file with a comma as field separator:
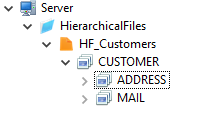
Next, create the record structure in a hierarchical way by adding new records with New > Record
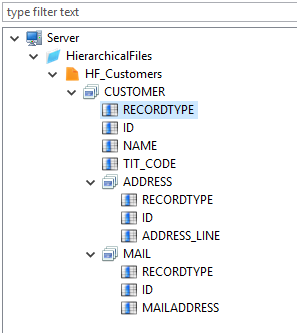
Finally, add the records' fields with New > Field
Note:
- The Physical Name and Type properties of each field must be set.
- Do not forget to set the Position Core property of each field, which indicates the position of the field in the record. You can also specify the Position for each record which will indicate its position in the output file. This can be useful when you need to create a header or a footer in your file.
Filters
The next step is to add a filter on each record with New -> Filter
The filters will be used at reading, to differentiate the different records.
They are required if you plan to read the file (using it as source in Mappings, etc...), otherwise, Stambia has no way to differentiate the records.
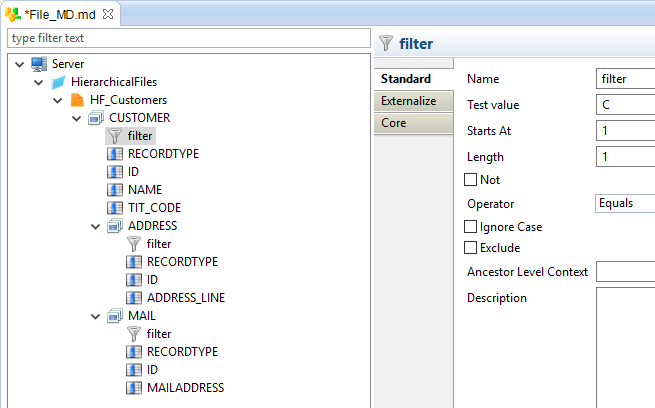
Each filter must be configured to test the value of the field that permits to recognize the record.
For our example, it is the RECORDTYPE field, which is the first character of the line (Starts At 1, Length 1).
For customer records, the value of RECORDTYPE is 'C' (for address 'A', ...).
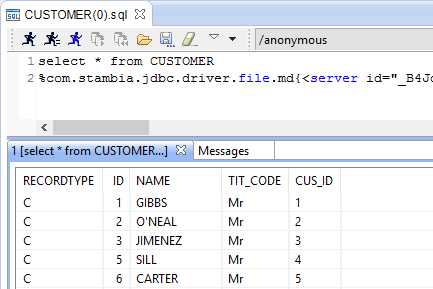
If the file exists on your machine, you can verify if a filter is correctly configured by consulting the record's data with Right click > Consult data on it.
The generated request should return the customers lines:
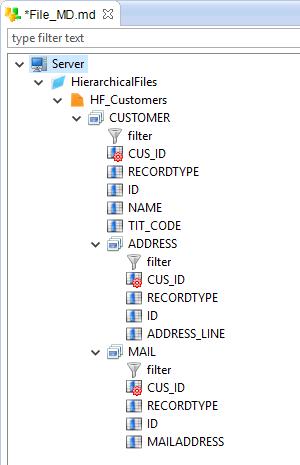
Computed Fields
The last step is to add computed fields, if necessary.
Computed fields are specific fields that are calculated at execution, when the file is read.
They are very useful to simulate a Primary Key/Foreign Key between records for joining records in mappings for example.
Please refer to this article to learn how to use computed fields.
We are going to use them on our file for this purpose:
Loading a hierarchical file
To load a hierarchical file:
- Create a Mapping.
- Drag and drop the source tables and the target file.
- Map the fields
- Change the Integration template to
Action Process INTEGRATION Hierarchical File

Note:
- The record nodes must be mapped with a repetition key. For each value of this key, a record will be created. Here a customer record will be created for each CUS_ID, a mail record for each EML_ID, ...
- The computed fields must not be mapped. They are only used at reading.
Using a hierarchical file as source
To use a hierarchical file as source, create a Mapping.
Next, drag and drop all the needed source records/sub-records from the hierarchical file. It is not possible to use fields from sub-records directly, they must be instantiated on the mapping:
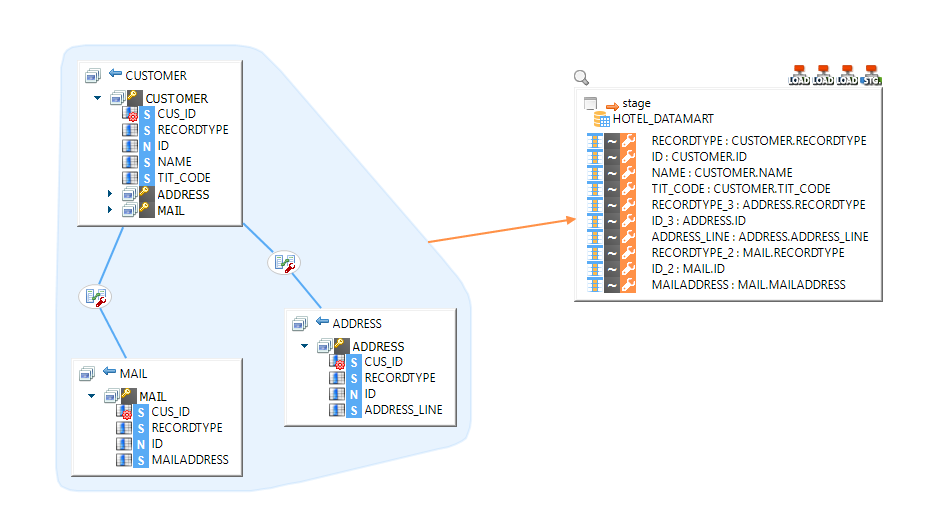
As you can see, the MAIL and ADDRESS records are instantiated on the mapping, and joined with the help of the computed fields.
For the example, we only load a stage table but it can be any RDBMS table.
If you want to load another file directly from a hierarchical file, you'll have to go through a stage, like explained in this article.