Docker is the leading container platform and can be used to run Stambia runtime inside containers. This article explains how to build a simple runtime container by giving examples, and how you can prepare a unique container image that can be reused for several purpose. The installation of a docker client and the detailed command options are out of scope of this article, please refer to official documentation at Docker docs
Prerequisites:
- Stambia DI Runtime zip archive
- Docker client environment ready
You can use this Dockerfile example below as a basis to build your stambia runtime docker container :
FROM openjdk:8u191-jre-alpine

ENV STAMBIA_JAVA_HOME /usr/
ENV STAMBIA_HOME /opt/stambia/stambiaRuntime/
ENV STAMBIA_PROPERTIES_LOCATION /opt/stambia/stambiaRuntime/properties/

COPY stambiaRuntime.zip /opt/stambia/
COPY wait-for /opt/stambia/

RUN unzip /opt/stambia/stambiaRuntime.zip -d /opt/stambia/
RUN chmod -R 755 /opt/stambia/

WORKDIR /opt/stambia/stambiaRuntime

CMD ["/opt/stambia/stambiaRuntime/startengine.sh"]
The file can be downloaded here document Dockerfile (437 B) (remove the .txt file extension)
The wait-for script can be used in case you need the container to wait for a particular HOST & TCP port to be reachable from the container before starting up the runtime. You can find this script at https://github.com/eficode/wait-for
If you don't need this script, remove the line "COPY wait-for /opt/stambia/" from the Dockerfile
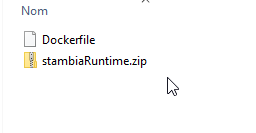
Prepare a folder containing the dockerfile and the stambiaRuntime.zip archive (and eventually the wait-for script) :

From this folder type the following commands to build the container image :
>cd myDockerFolder
>docker build . -t <containername>
Example :
>docker build . -t myrepo/devruntime
The output should look like this :

Then you can start your container interactively (-it) using the following command :
>docker run -it -p <hostport>:<guestport> --rm <containername>
So for example to expose the ports 42000,42100,42101,42200 of the "devruntime" container to the same ports on your host you can run the following command :
>docker run -it --rm -p 42000:42000 -p 42100:42100 -p 42101:42101 -p 42200:42200 myrepo/devruntime
Alternatively, if you want to use different ports or start a second container on the same host, you can change the exposed ports to 43XXX instead of 42XXX for example :
>docker run -it --rm -p 43000:42000 -p 43100:42100 -p 43101:42101 -p 43200:42200 myrepo/devruntime
To change the java memory options you need to set the right environment variables for the container. You can use the ENV primitive of the Dockerfile or set the variables using the command line :
>docker run -it --rm -p 42000:42000 -e "STAMBIA_MAX_MEMORY=2048m" myrepo/devruntime
Notes :
- STAMBIA_MAX_MEMORY environment variable does not exist at the time I'm writing this article (S17.6.6), but you can manually edit the initvariables.sh to reflect this behavior, or download the modified .bat/.sh scripts here : archive initVariablesScripts (3 KB)
- You can review the environment variables reference in the official documentation
If you need to have a folder of your container to be persisted on your host filesystem you can use the --mount option of the docker run command. For example if you want the technical log files to be written outside of your container you can use the following command :
>docker run -it --rm -p 42000:42000 --mount type=bind,source=D:\Docker\runtime\sharedFolder\log,target=/opt/stambia/stambiaRuntime/log myrepo/devruntime
Please be aware that the mounted folder will replace the folder inside your container and the files inside the container folder will not be reachable anymore.
For the technical logs there are other possibilities as the log4j system used by the runtime allows the configuration of log appenders to send log information to multiple destinations (see documentation at https://logging.apache.org/log4j/1.2/manual.html). A minor change can be made to send all the logs to the standard output which is a common best practice with docker. It can be done by editing the log4j.xml file inside the properties folder to add the console appender to every logger. For example for the logger "com.indy.engine.rdbmsLog" :
<logger name="com.indy.engine.rdbmsLog">
        <level value="info"/>
        <appender-ref ref="consoleAppender"/>
        <appender-ref ref="rdbmsLogAppender"/>
</logger>
This setup is only suitable for a developement environment, if you want to be able to change the configurations dynamically, you will have to prepare a container with more flexible configurations. This can be done by updating the configuration files to use environment variables using the syntax described in this article. It can be useful to set dynamically the ports, log database configuration, scheduler configuration etc. It can also be used to change the folder paths of the container to target a unique folder mounted outside the container and so avoid to mount each folder separately.
Communications from Stambia Designer and Stambia Analytics to the runtime can be made using RMI or HTTP depending on your runtime version. Please refer to this article for more information


