

Stambia DI can work with Twitter to perform operations such as posting and searching Tweets, retrieve various information, and more...
You will find in this getting started article the first steps to start working with Stambia DI Twitter Component.
You can also refer to Stambia DI for Twitter article for further information about supported operations, download page, and more.
Prerequisites:
- Stambia DI Designer 20.3.0 or higher
Note:
Stambia DI is a flexible and agile solution. It can be quickly adapted to your needs.
If you have any question, any feature request or any issue, do not hesitate to contact us.
Component Installation
Install Twitter Component as any other Stambia Component.
Refer to the Stambia DI for Twitter article for the download section.
Once the installation is performed, you can continue to the next step.
Metadata Creation
Security Metadata creation
About security
The first step, before creating the Twitter Metadata, is to create the security Metadata which will contain the login information to access Twitter.
Twitter is using OAuth1 authentication method, so the first thing to do is to create an HTTP Security Metadata and define inside the OAuth1 information required to communicate with Twitter.
This is where you'll enter all the authentication information that will be used later to communicate with Twitter when you'll try to perform operations, by generating the necessary tokens.
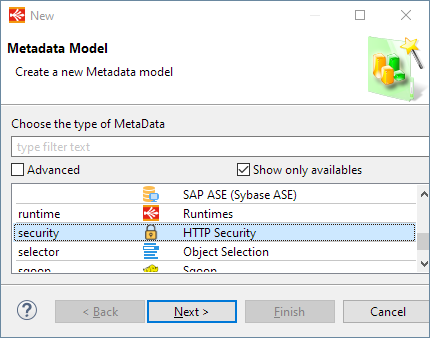
Creating HTTP Security Metadata
Create an HTTP Security Metadata:
Then, optionally define a name on the root node, and launch OAuth wizard from context menu:
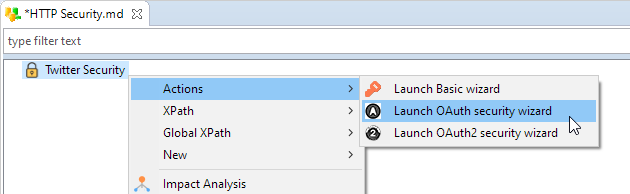
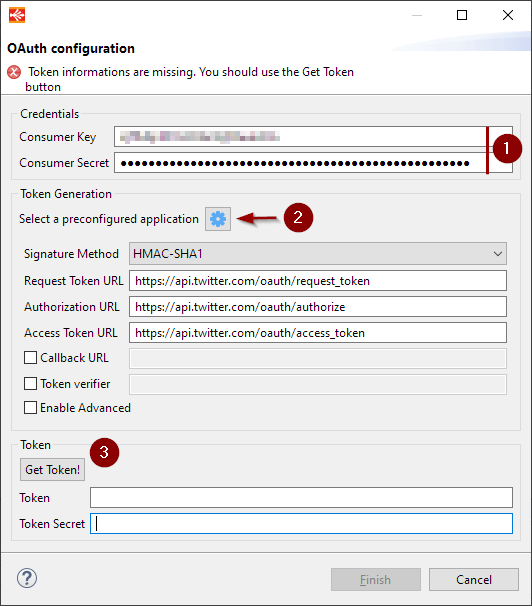
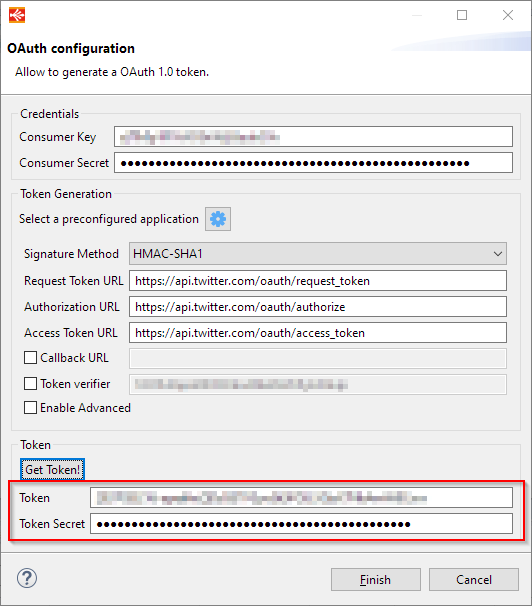
In this wizard, you will define all necessary information that are required to generate a Token
You can contact your administrators to find those.
Then generate the Twitter token.
This will open a popup in which you will login with Twitter account that will perform the Twitter operations.
This is the account for which the token will be generated, and the account on which the operations will be performed, so be careful to the one you are using here.
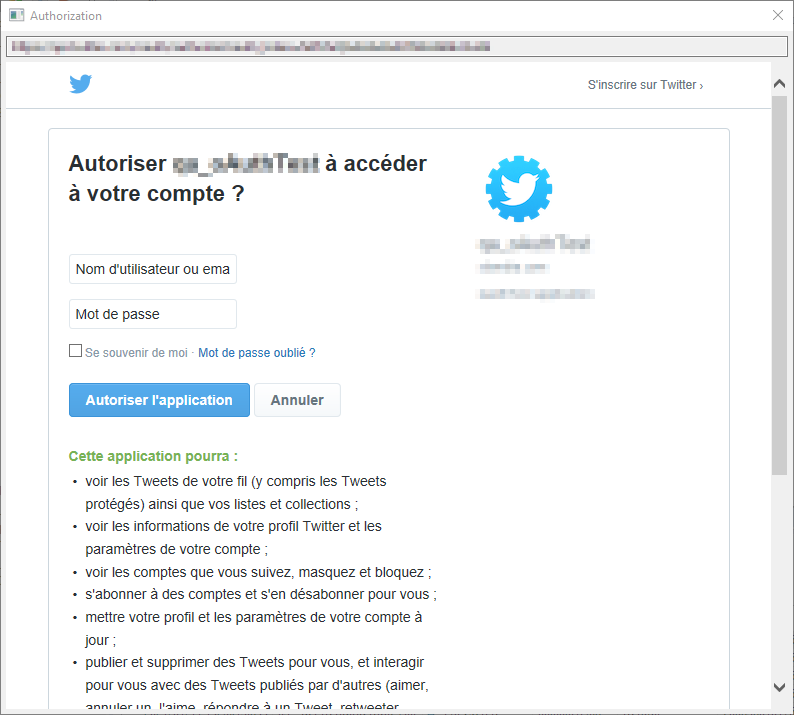
After logging in, it will ask to confirm you are giving permissions to perform operations on behalf of the account: the permissions asked will depend on the permissions you have configured on your Twitter Application.
Once accepted, the token will be generated.
You can click on finish.
Twitter Metadata creation
About Twitter Metadata
Twitter Metadata will allow you to reverse common operations such as posting and searching Tweets, retrieve various information, and more...
It will allow you to define also your own operations: simply refer to Twitter's REST API if you want to define your owns, to know what are the request parameters, what are the responses, ...
Once you have created your HTTP Security Metadata, as described previously, you are ready to create the Twitter Metadata.
Creating Twitter Metadata
Create the Twitter Metadata:
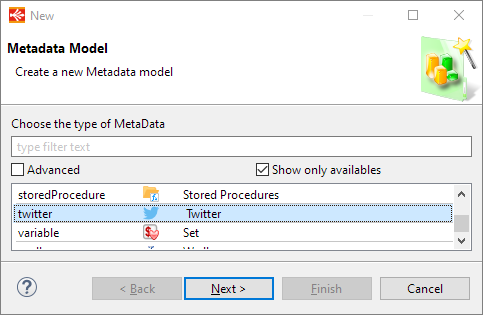
Choose the HTTP REST Module to use and click on Finish.
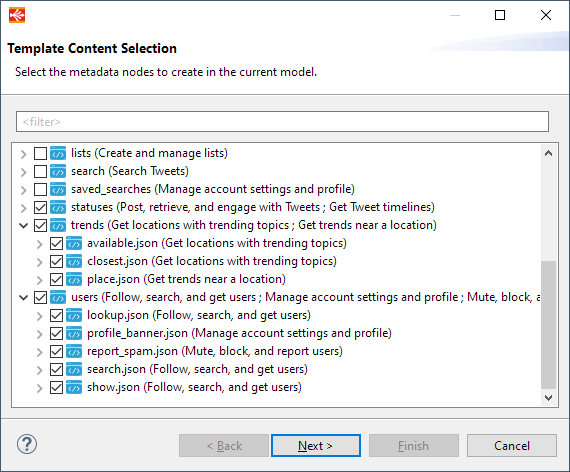
Once the Metadata is created, it opens a wizard which allows you to select which operations you want to reverse in Metadata: you can select the operations you want to use, and then click on next.
Note that you can come back later this wizard to reverse additional operations in your Metadata at any time.
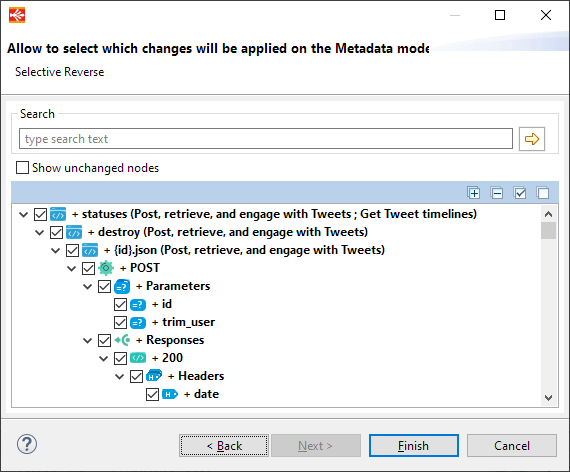
The final step displays the details of the operations you chose to reverse.
It is the selective reverse page where you choose which nodes will be created / updated / deleted in your Metadata.
For the creation of the Metadata, you can simply use the check all button to select all the nodes to save.
When you are using the wizard on an existing Metadata to reverse additional operations, make sure that you selected the proper nodes to save in this page.
Configuring security
Twitter Metadata being created, the next step is to choose the security to use.
For this, lead to the root node of Twitter Metadata.
Then, simply select a previously created OAuth1 security node.

Understand and customize Twitter Metadata
Now you have created and parametrized a brand-new Twitter Metadata, you can explore and customize it.
Communication with Twitter is performed through the available Twitter REST APIs.
Reversed operations should have information and a link to the related Twitter API documentation if you need further information about the request and response parameters.
Moreover, as Twitter is working with REST APIs, Twitter Metadata is based on an HTTP REST Metadata, so you can do anything that is supported in an HTTP REST Metadata.
You can add new operations, update or customize the operations you reversed.
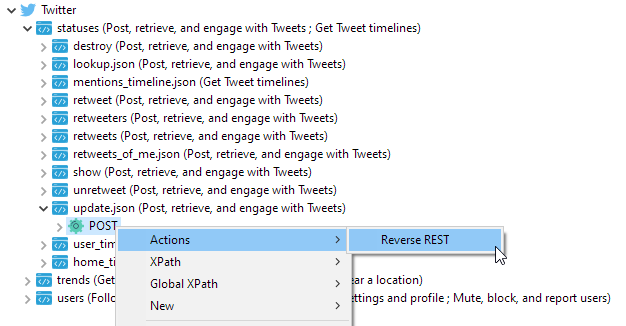
As an example, you can also test operations through the Reverse REST wizard context menu.
Working with mappings
Performing Twitter Operations
Your Twitter Metadata being ready, you can start performing some operations.
As described previously in the article, Twitter operations are performed through Twitter REST APIs.
Therefore, you must use the Metadata as you would use an HTTP REST Metadata.
You can create Mappings and drag and drop inside your Twitter operations.
You can then invoke them a certain amount of time from a source datastore and then, finally, optionally retrieve the various responses returned.
Below are some examples.
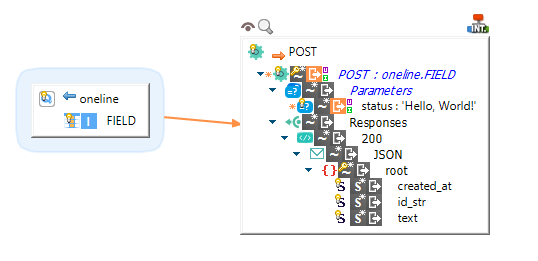
Updating the status of the current account
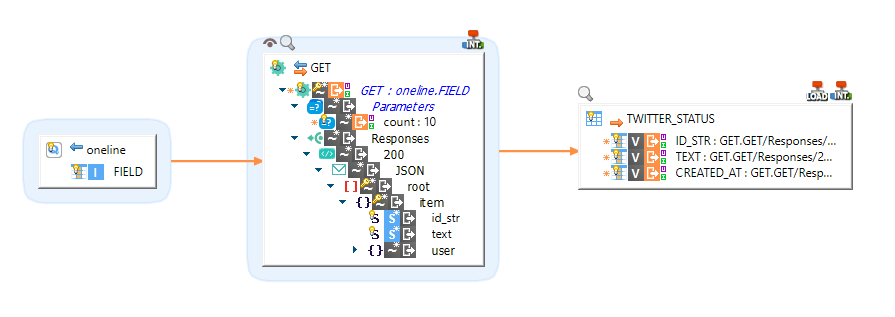
Getting home timeline tweets and storing the results
Getting current trending topics in U.S.
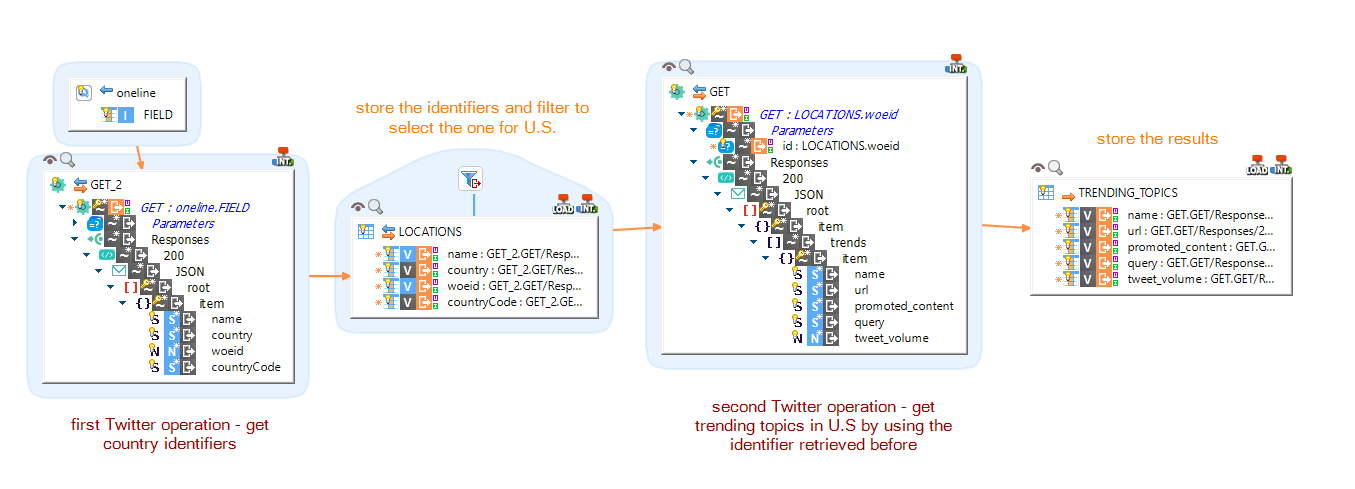
In this last example, we perform two Twitter operations, one to retrieve the identifier for U.S, and then another one to retrieve the trending topics based on this identifier.
Troubleshooting
If you encounter issues performing Twitter operations, make sure your operation is properly configured and that you defined the necessary request parameter and content, when required.
As a reminder, as Twitter Metadata is based on HTTP REST Metadata, you can also test the requests directly in Metadata through the Reverse REST wizard, to make sure the Metadata is properly configured.
You can also handle the error responses as usually, by defining the response code, by retrieving the responses message in your Mapping, etc.
Finally, note that you can also enable debug mode on the Template, to print the exchanges which are performed with Twitter API.