

As explained in the presentation article, Stambia can work with Google Cloud Platform to perform operations on technologies such as Google BigQuery or Google Cloud Storage.
To accomplish this, you'll first have to install the dedicated Components and prepare your environment.
You can find below all the explanations and instructions to install and set up everything to get ready to work with Google Cloud Platform (GCP).
Prerequisites:
- Stambia DI Designer S18.3.8 or higher
- Stambia DI Runtime S17.4.7 or higher
- Java 1.8
This article is dedicated to Stambia DI S17, S18, S19
Please refer to this article if you are using Stambia DI S20 or higher
Component installation
Installation
You must install Google Cloud Platform and Google BigQuery Components to be able to work with those technologies in Stambia DI.
You can find Components download section and installation procedure at this location.
Additional configuration steps
JDBC Drivers Configuration
One additional step is required if you plan to work with Google BigQuery.
You'll have to configure the Google BigQuery entry in JDBC Drivers Preferences.
It is necessary to configure it if you want to connect, reverse or consult data through the Designer on Google BigQuery.
The entry in the Designer is already pre-configured and all you have to do is to modify it to add the additional libraries.
Open the Window Menu > Preferences > SQL Explorer > JDBC Drivers > select "Google BigQuery" and click on Edit
Then, lead to the "Extra Class Path" tab and click on "Add JARs".
Use the Popup to select all the Google BigQuery libraries which have been automatically extracted by the connector to <Designer Installation Directory>/stambiaRuntime/lib/addons/bigquery
You can use shortcut as "CTRL+a" to select everything if required.
Then, click on OK to save your modifications.
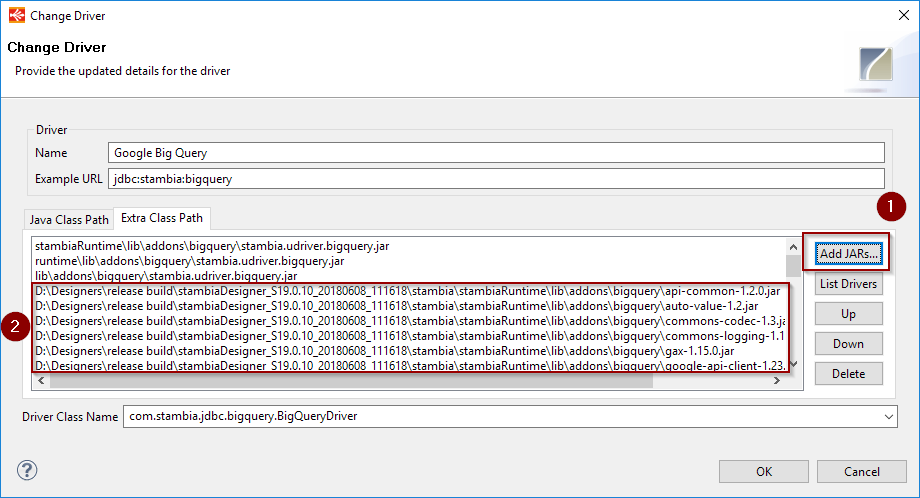
The screenshot only shows some of the additional libraries as an example, you must add here all the libraries
If the Google BigQuery entry does not exist in JDBC Drivers, you can add it manually. The needed information will be the following:
Example URL: jdbc:stambia:bigquery / Driver Class Name: com.stambia.jdbc.bigquery.BigQueryDriver (retrieved from stambia.udriver.bigquery.jar)
Metadata Definition
When Stambia DI Google Cloud Platform Connector is installed and configured, you can start creating your first Google Cloud Platform Metadata.
This Metadata is the main Metadata that will be used to centralize the credentials that will be used in other Metadata such as Google Storage or Google BigQuery.
It represents a Google Cloud Project and the information to connect to this project.
Metadata creation
Create the Metadata, as usual, by selecting the technology in the Metadata Creation Wizard:
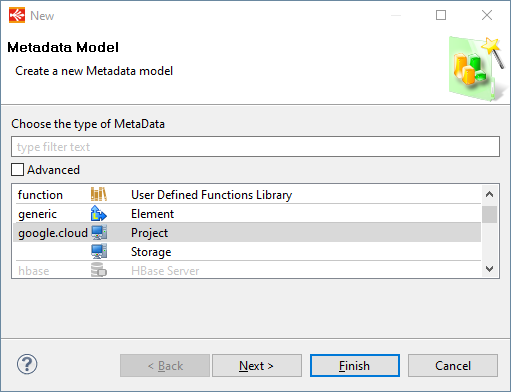
Click next, choose a name and click on finish.
Metadata configuration
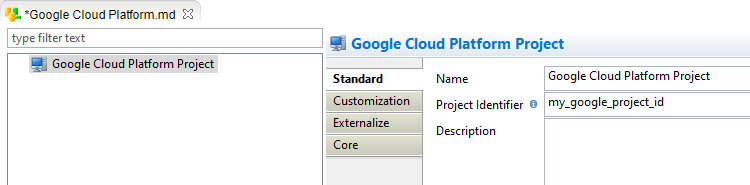
First information to define in Metadata is the Google Cloud Project Identifier, which is the unique identifier of the project you want to work on.
Check with your administrator or lead to Google Cloud Platform's console page in your browser to find it, and then define it in Metadata.
Next step is to define credentials to connect and perform operations on the project.
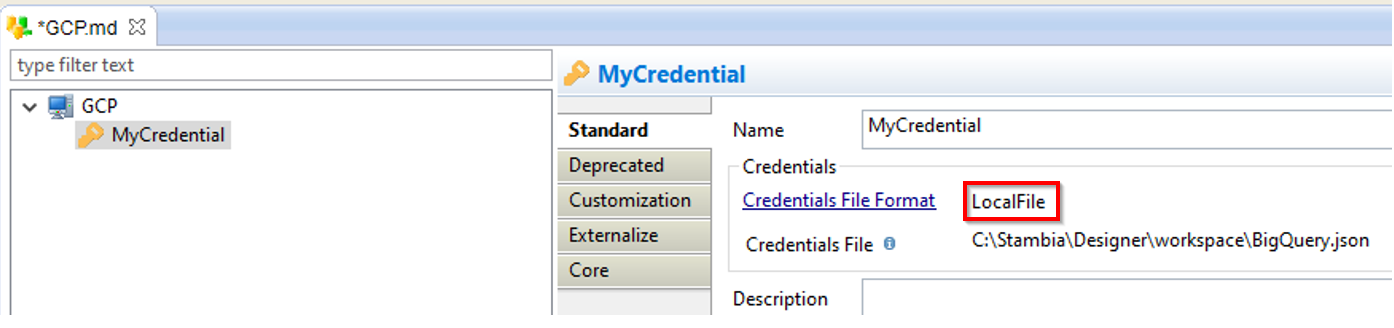
For this, create a credential node under the root node and define a "Credentials File Format" : a "localfile" or a "string".
In both cases, the credential represents the JSON private key file containing the access token, which can be generate from Google Cloud Platform's by administrators.
Example with local file
Example with string

Here is some information about these two attributes:
| Name |
Description |
| LocalFile |
Absolute file path to the JSON private key file corresponding to the account to connect with. Note that it must be accessible by the Runtime on the file system. |
| String |
JSon Access token string. This corresponds to the content of the JSON private key file corresponding to the account to connect with. To fill this attribute, open your JSON private key file, copy its content and paste it in the attribute.
The advantage is that, instead of using a file path as with the other attribute, you specify the credentials directly in Metadata, so you do not have to store a local file somewhere that can be accessed by the Runtime. The downside is that this attribute is stored as plain text inside the Metadata. We advise to use it for development purposes, and to consider using the local file option instead for production environments. |
Here is an example of JSON credential file:
{
  "type": "service_account",
  "project_id": "mygoogleproject",
  "private_key_id": "myprivatekey",
  "private_key": "myprivatekeyvalue",
  "client_email": "myaccountemail",
  "client_id": "myclientid",
  "auth_uri": "https://accounts.google.com/o/oauth2/auth",
  "token_uri": "https://accounts.google.com/o/oauth2/token",
  "auth_provider_x509_cert_url": "https://www.googleapis.com/oauth2/v1/certs",
  "client_x509_cert_url": "mycerturl"
}
Demonstration Project
Demonstration projects presenting common and advanced usage of the Google Cloud Platform and Google BigQuery in Stambia DI are available.
You can import them it in your workspace and then have a look at the Mappings and Processes examples.
It is a good start to familiarize with its usage and to see how the Metadata are configured, for instance.
On Stambia DI S17, S18 and S19, you must download the sample projects separately from the download section.