The Web Services HTTP REST Metadata is shipped with a wizard to help the user testing and reversing HTTP REST Web Services.
This wizard allows to define the input and output parameters, the URL to request, the method to use, to perform a test request with test values to see the response of the Web Service and it offers the possibility to choose what should be reversed in the Metadata.
In this article, we are going to use a Stambia Published Web Service to demonstrate how to use the wizard using HTTP REST metadata.
Prerequisites:
- Stambia DI Designer S20.1 or higher: Web services reverse using http rest API is available since S20.1
- You can refer to this article if you use a Stambia DI Designer S19 version or lower
Metadata preparation
You can create a new Metadata HTTP rest API or use an existing one. Here is the necessary steps to create a new Metadata:
Frist, ask to create a new Metadata and choose "http rest api" as metadata type, define metadata name (you can keep de default defined name if not yet used in your project), you have to select module (http rest is selected by default) and finish: a wizard to define the Http security and http Proxy is automatically opened:
Option to define proxy security from http wizard is available from Stambia DI S20.4
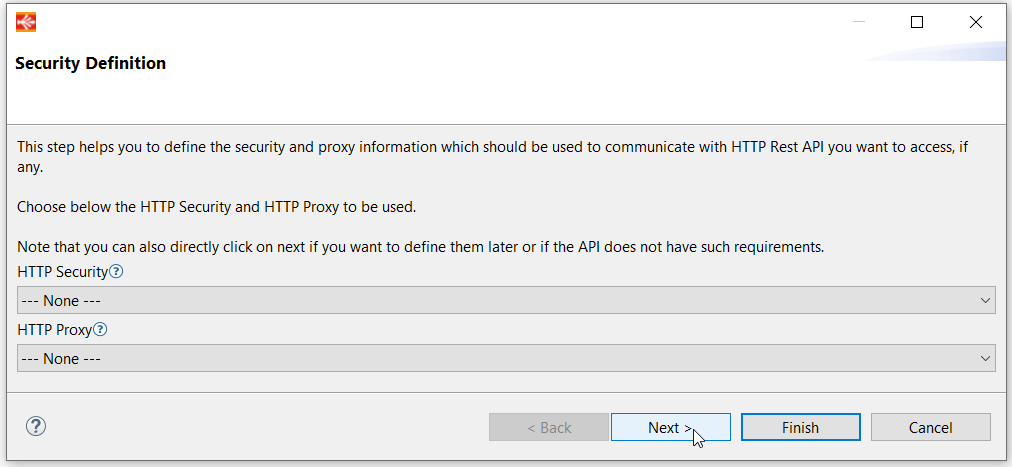
Default values of http security and http proxy are "none", these fileds are not mandatory. You can select one of existing Http security and or Http proxy if any, and you can refer to this article for further information about the creation of http security and http proxy. And Continue by clicking to the Next button.
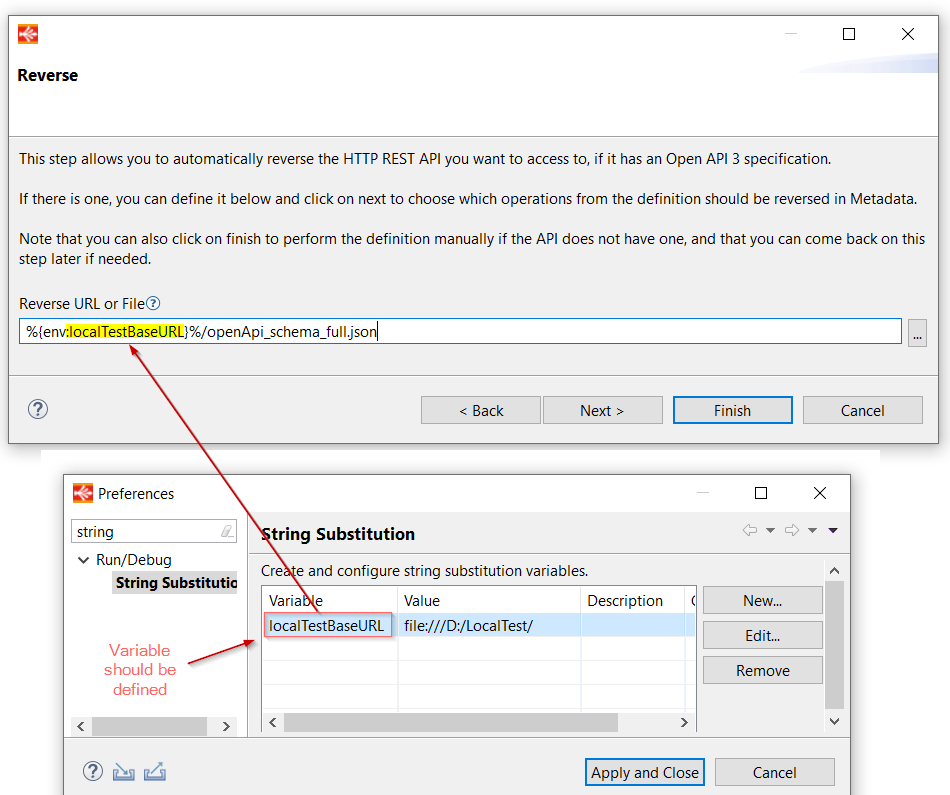
You will be redirected to a new screen where we define the reverse URL or File and you can insert the file to reverse directory or the url to reverse.
From stambia DI S20.4, it is possible to use a string substitution variables inside the HTTP Rest wizard on the Reverse URL like %{env:variable_name}%)
After selecting the file or url to reverse, and clicking to Next button, you will be redirected to the usual screen when we select the node to reverse and finish.
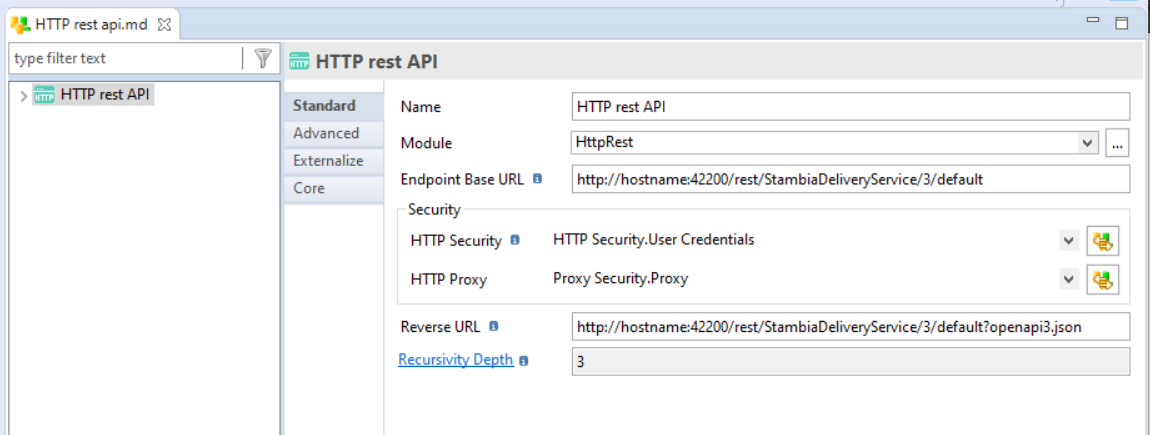
We will see all elements we have previously defined in the Metadata properties:
For instance in this capture we have defined http security and http proxy and reverse an Open API url:
The possibility to reverse an Open API URL is available from Stambia DI S20.4
If needed to change element, you can change it from the Metadata properties view or by launching wizard from the http rest metadata root:

Using the Wizard
The Metadata is ready to use the wizard.
- In the metadata editor, right click on the root node and add new "path"
- Right click on the path and add new "Operation" (for example "POST")
- Save the metadata
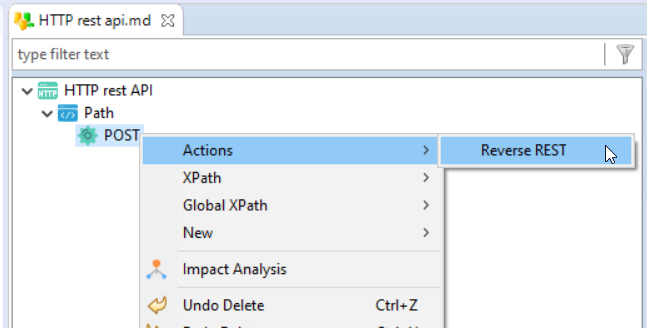
To launch the wizard, simply right click on the operation, and choose Actions > Reverse REST
The wizard starts, and you can now specify everything required to test and reverse the Web Service.
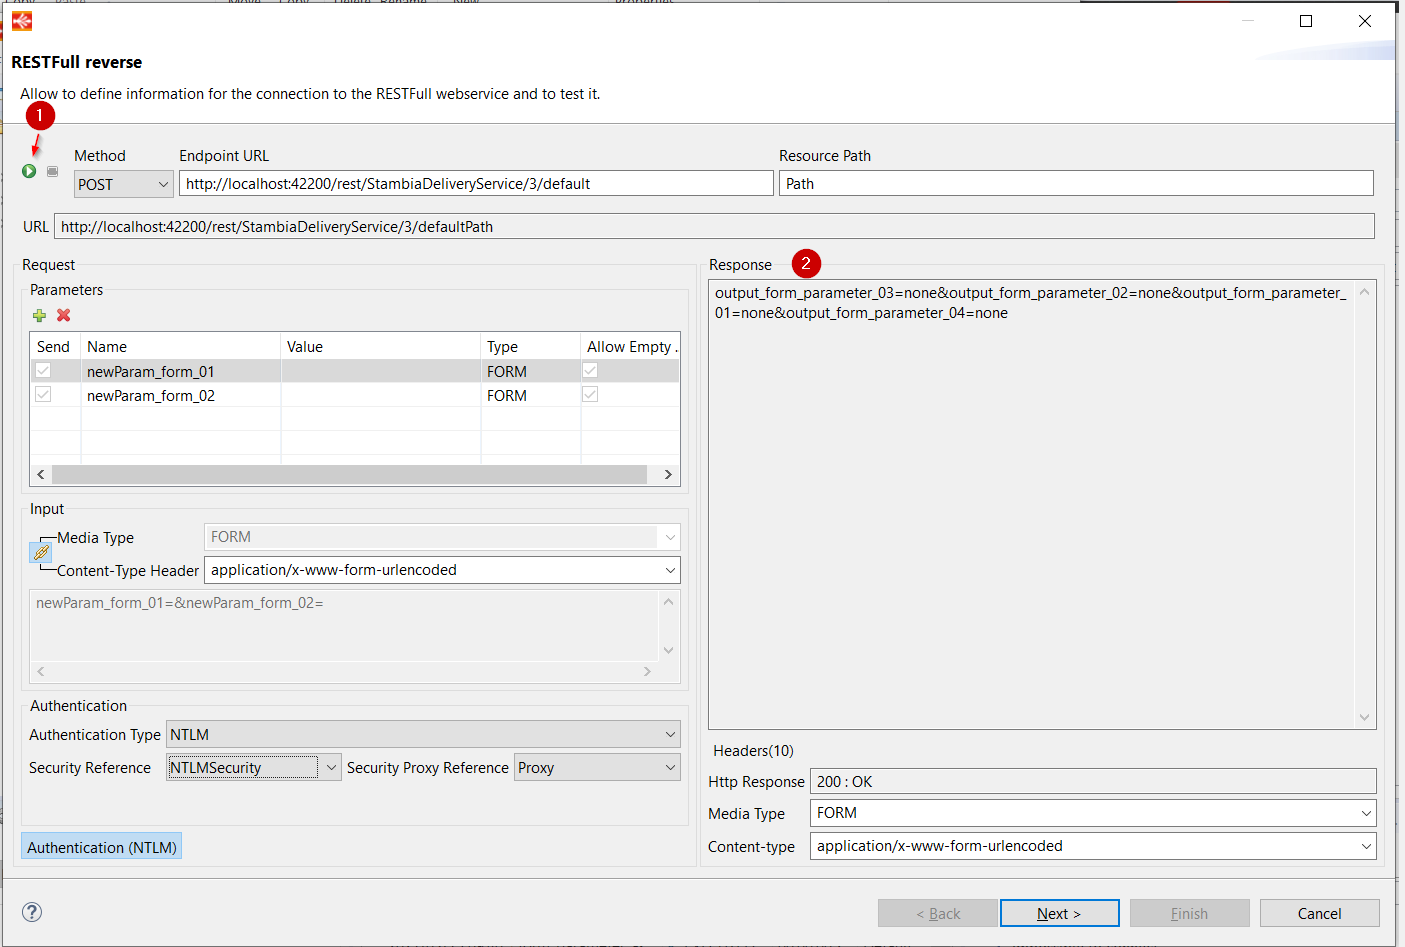
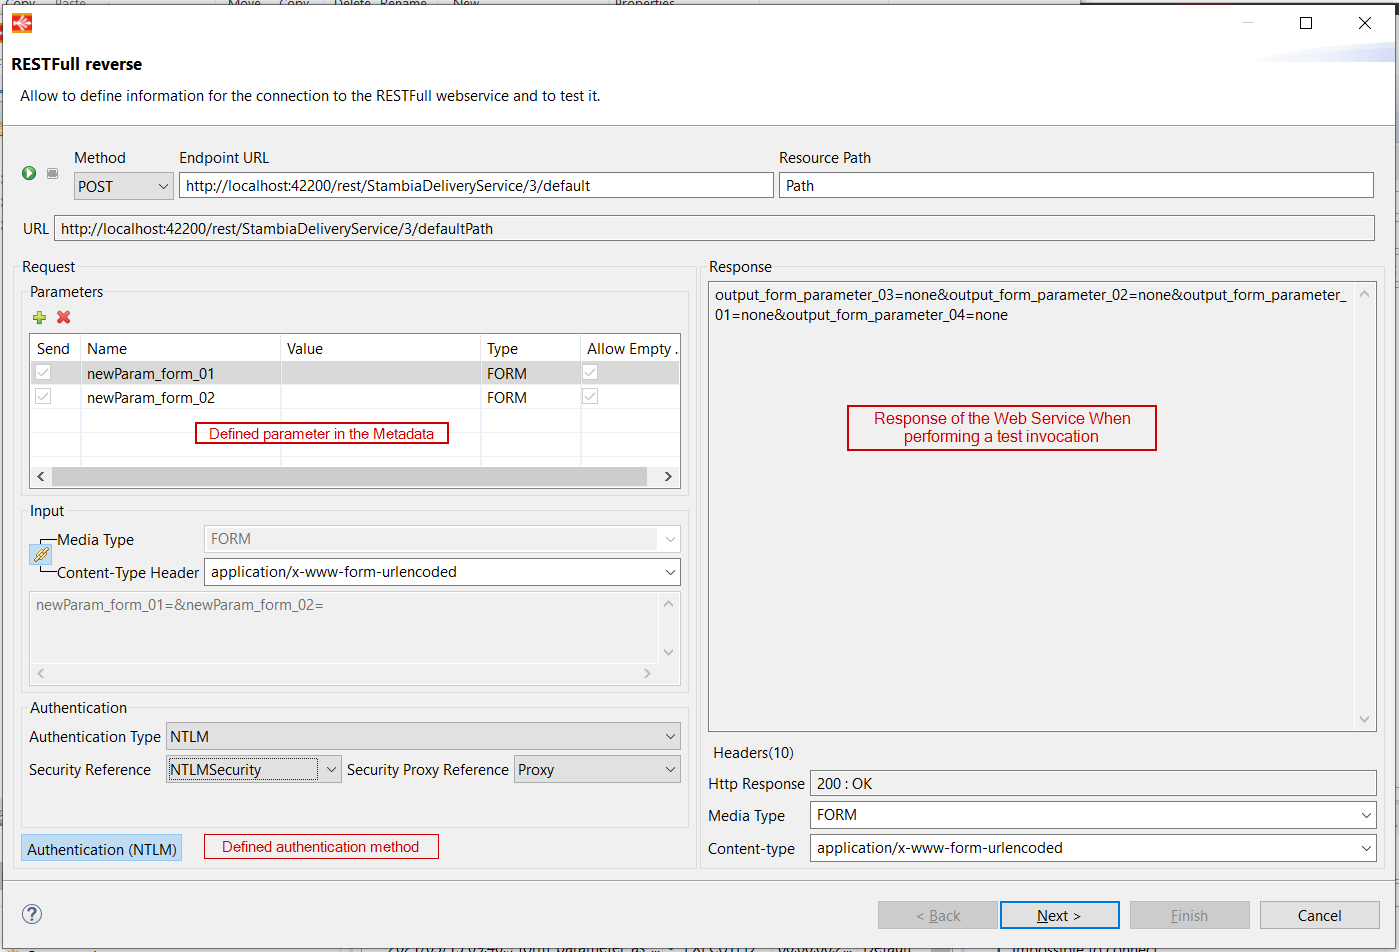
Here is an overview of our final invocation with everything configured:
The possibility to define FORM value from Http rest wizard and to use the NTLM security are available from Stambia DI S20.4
Request Input Definition
The first step is to define the request (input) parameters, headers, body, and authentication on the left part of the wizard:
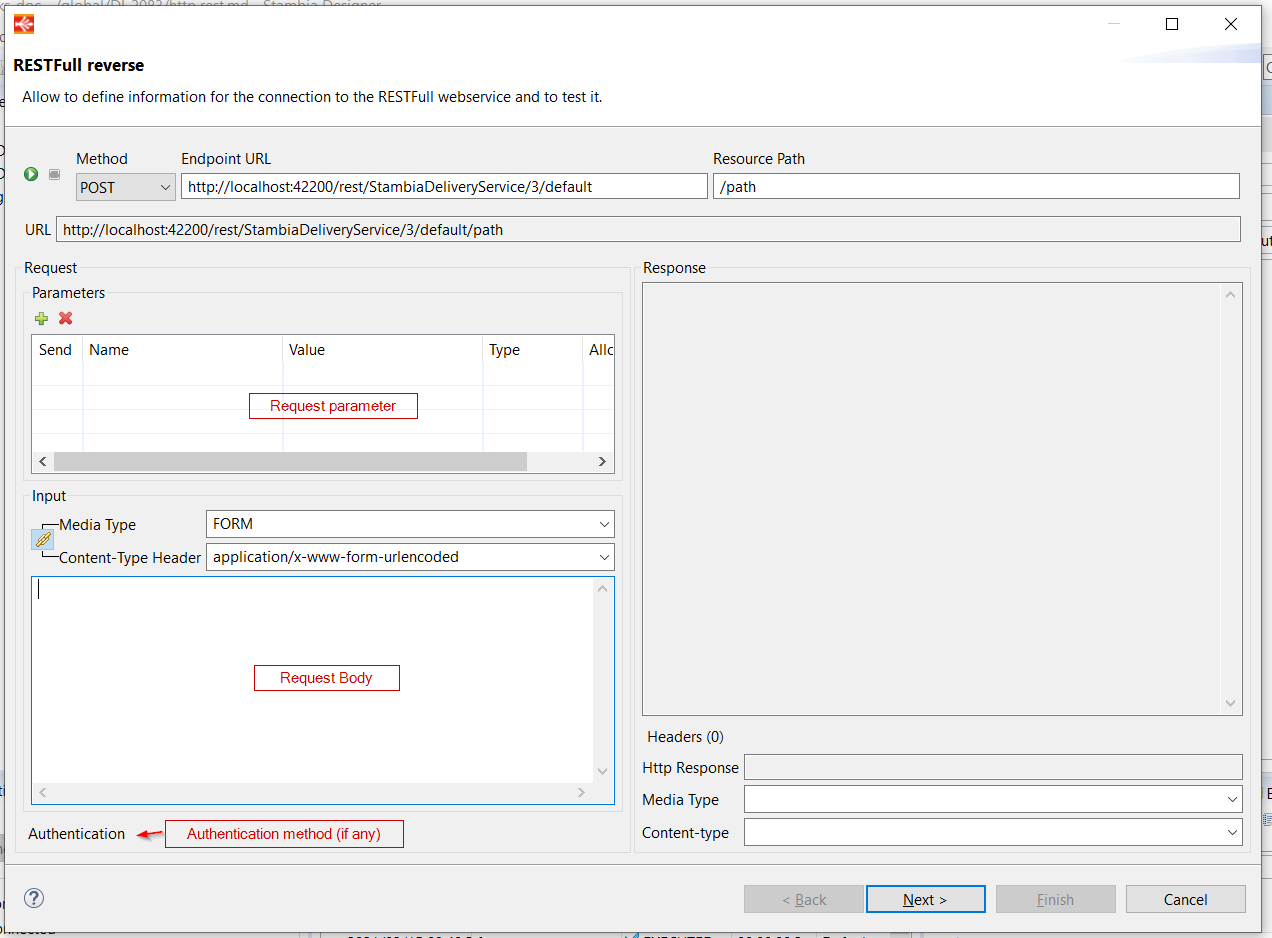
Request parameters
In the request parameters part, you can define new parameters by clicking on the "+" button.
Specify then which type of parameter it is, its name and test value:
The possibility to select COOKIE parameter types is available from Stambia DI S20.3
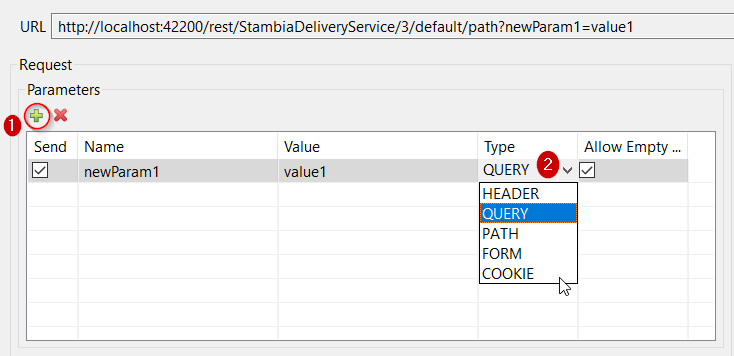
About the value
The value is a test value that will be used when performing a test invocation to retrieve the response of the Web Service.
It will not be stored in the Metadata at the end.
About the Type
The "Type" defines the type of parameter it is.
The following types are available:
| Type | Description |
| HEADER |
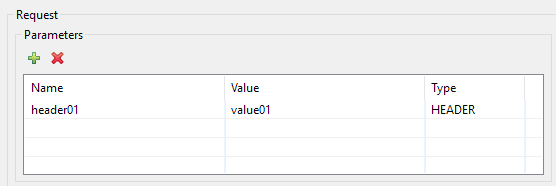
Parameter that will be added as an HTTP header when invoking the Web Service. An HTTP header defined like this will be reversed in the Input Metadata of the Web Service to be able to specify it dynamically in the future Mappings that will invoke it. If you want to define an HTTP Header with a fixed value, that will never change and must be transmitted at each invocation, please look at the 'Request Headers' part of the wizard that is explained further in the article. |
| QUERY | Parameter that is added at the end of the request URL. |
| PATH |
Parameter that replaces a user defined mask in the request URL. When using this parameter, you must add in the request URL (in the 'Resource' part for instance) the mask to be replaced. |
| FORM |
It is handeled from the Parameter table the 'Type' PLAIN allowed when the Content-type Header is "FORM" When this type of parameter is defined:
|
| COOKIE |
When this parameter is specified, the specified cookies are sent each time a request is sent, they should not be stored or kept, they are simply sent when performing the request with the value specified. |
Example of HEADER parameter
Example of QUERY parameter:
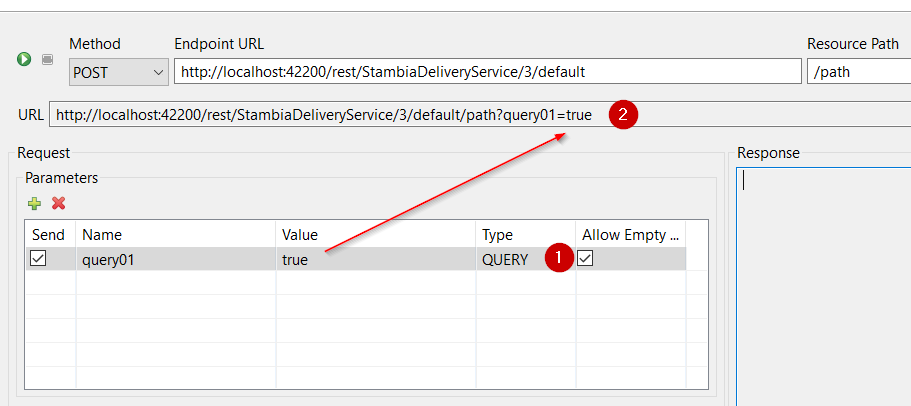
You can see the impact on the calculated URL
Example of PATH parameter:
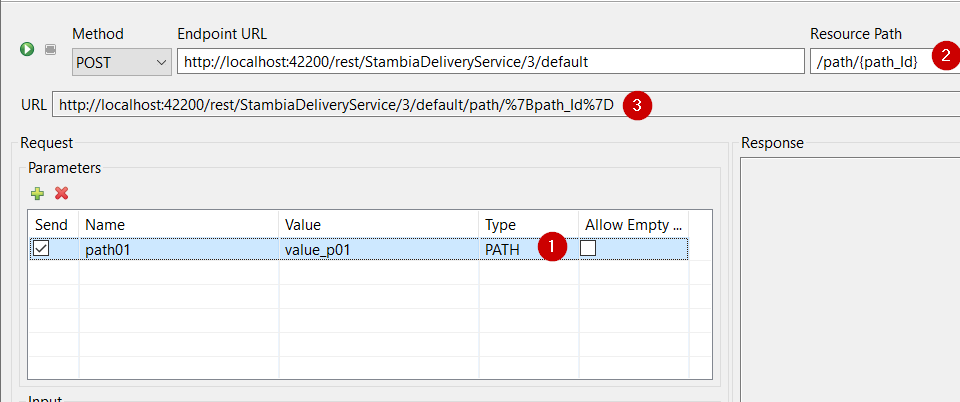
You can see the impact on the calculated URL
Example of FORM parameters:
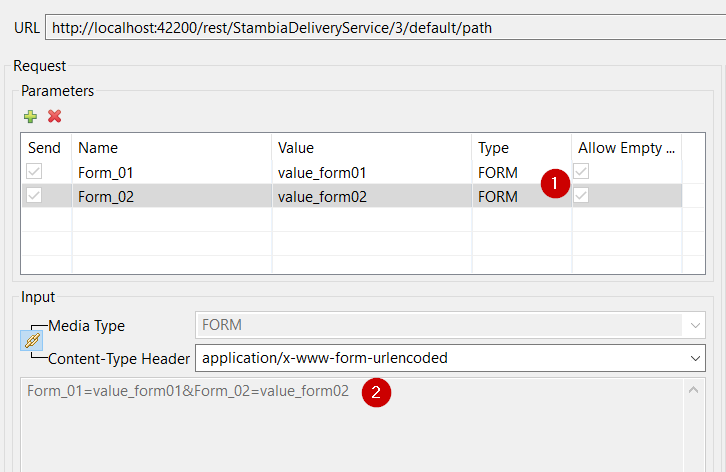
You can see the calculated test value in the Input body
Example of COOKIE parameter:
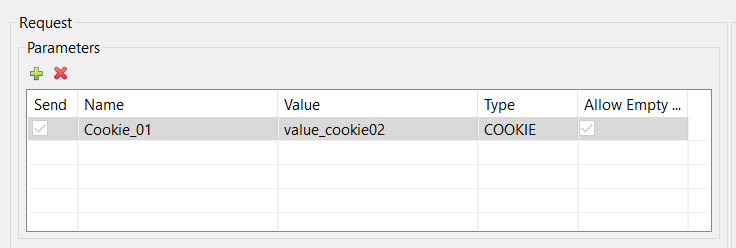
Request body
The request body part represents the input body of the HTTP request.
If the Web Service is waiting for an input body, simply select the associated type and fill the body expression:
A option to link the selected "Media Type" with the "Content-Type Header" is available:
- When this link is disabled, user can select "Media Type" and select manually the "Content-Type Header"
- When this link is enabled, after each "Media Type" selection the "Content-Type Header" is automatically updated according to the selected Media Type. However user can manually change the content type
Available Media Types are JSON, XML, TEXT, FORM, BINARY:
The possibility to define "Media Type" in input field is available from Stambia DI S20.4 and the link button between Media Type and Content-Type Header has been also added from this version for practical usage.
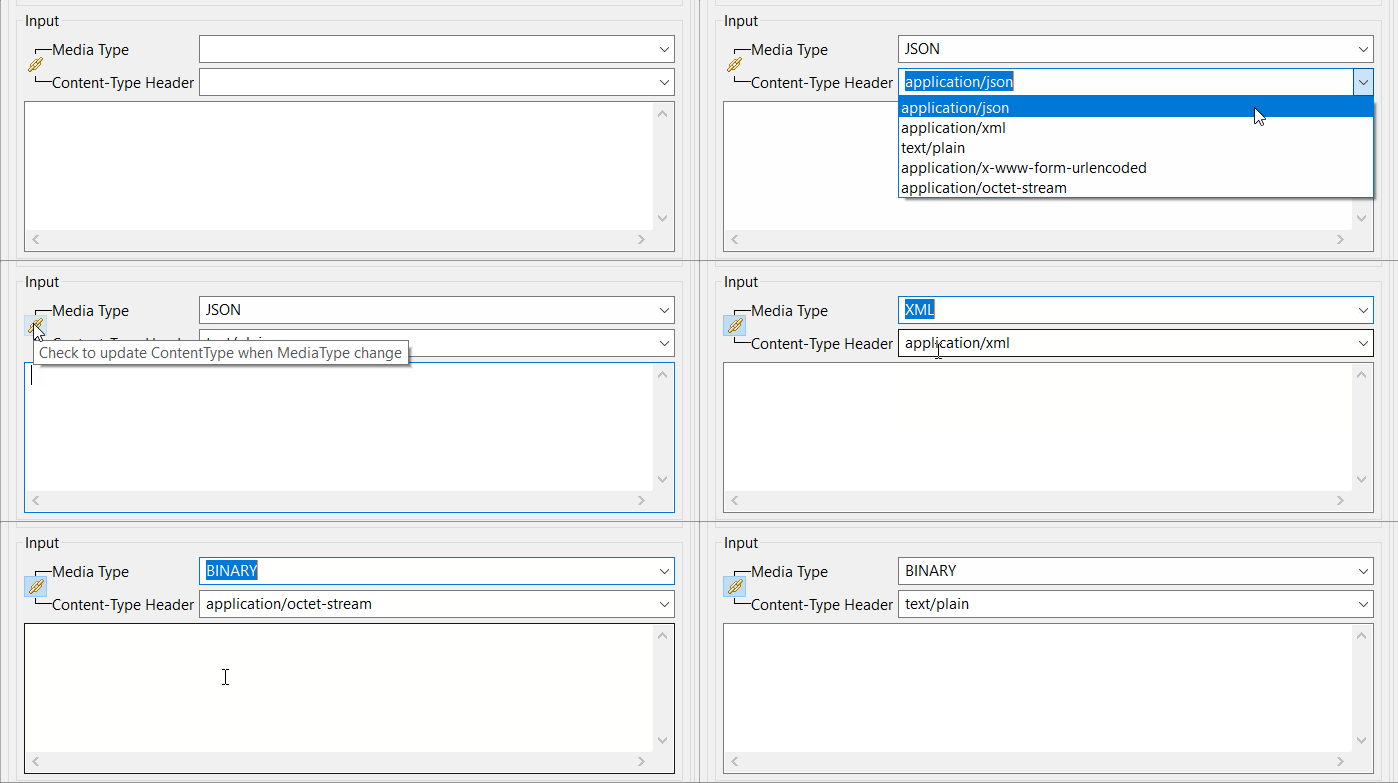
Request Authentication
The request authentication part allows to define the authentication mechanism that must be used to authenticate when invoking the Web Service.
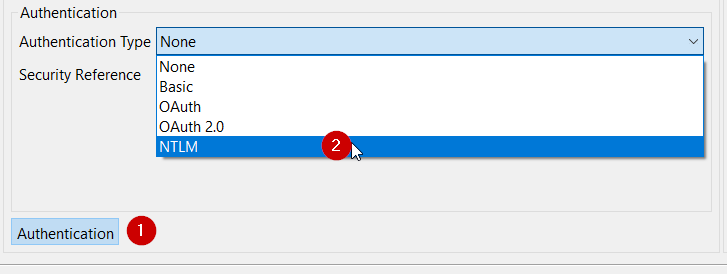
This authentication type can be either NTLM, OAuth2, OAuth1, Basic or None if the Web Service isn't protected.
Select first the Authentication Type:
Then choose the corresponding security node that contains the authentication information:
Finally, optionally specify the security node that should be used if the request is redirected through a proxy. This is not the proxy settings for the Web Service invocation, but the authentication that should be used if the request is redirected by a proxy (proxy settings are set outside of the REST wizard, directly on the operation Metadata node, in the Proxy tab.)
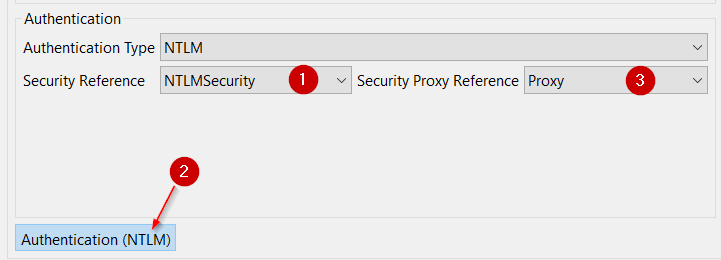
Security nodes are created / edited directly in the Metadata.
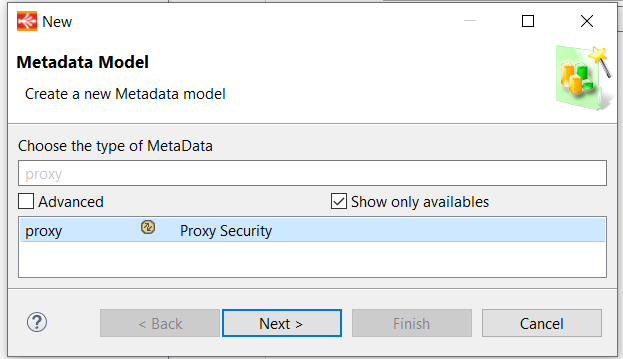
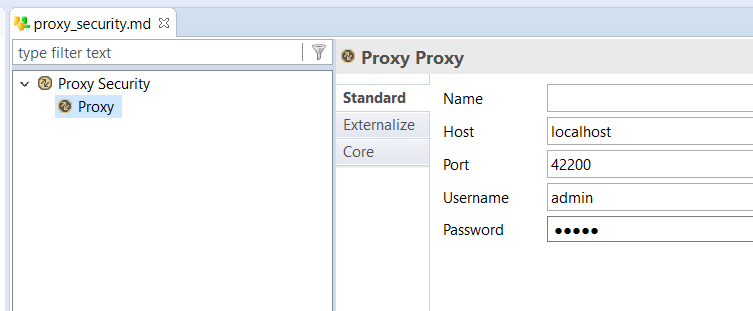
For instance, for the 'Proxy' node of our example: "Proxy Security" type of metadata is defined before configuring wizard
The proxy security definition:
And use the proxy security in the metadata http rest api:

Web Service Test and Output Definition
The request part being ready and configured, it is now time to test it by calling the Web Service, which will also allow to retrieve the response Output.
For this simply click on the top start button.
The Web Service will be called with the defined parameter, and the response will appear on the right part:
The Response body, headers, and Response code will appear there.
Check that it corresponds to what you expected, and fix the possible errors if needed by updating the request parameters accordingly.
If everything is ok, you are ready to reverse in Metadata the Web Service.
Reversing the information in Metadata
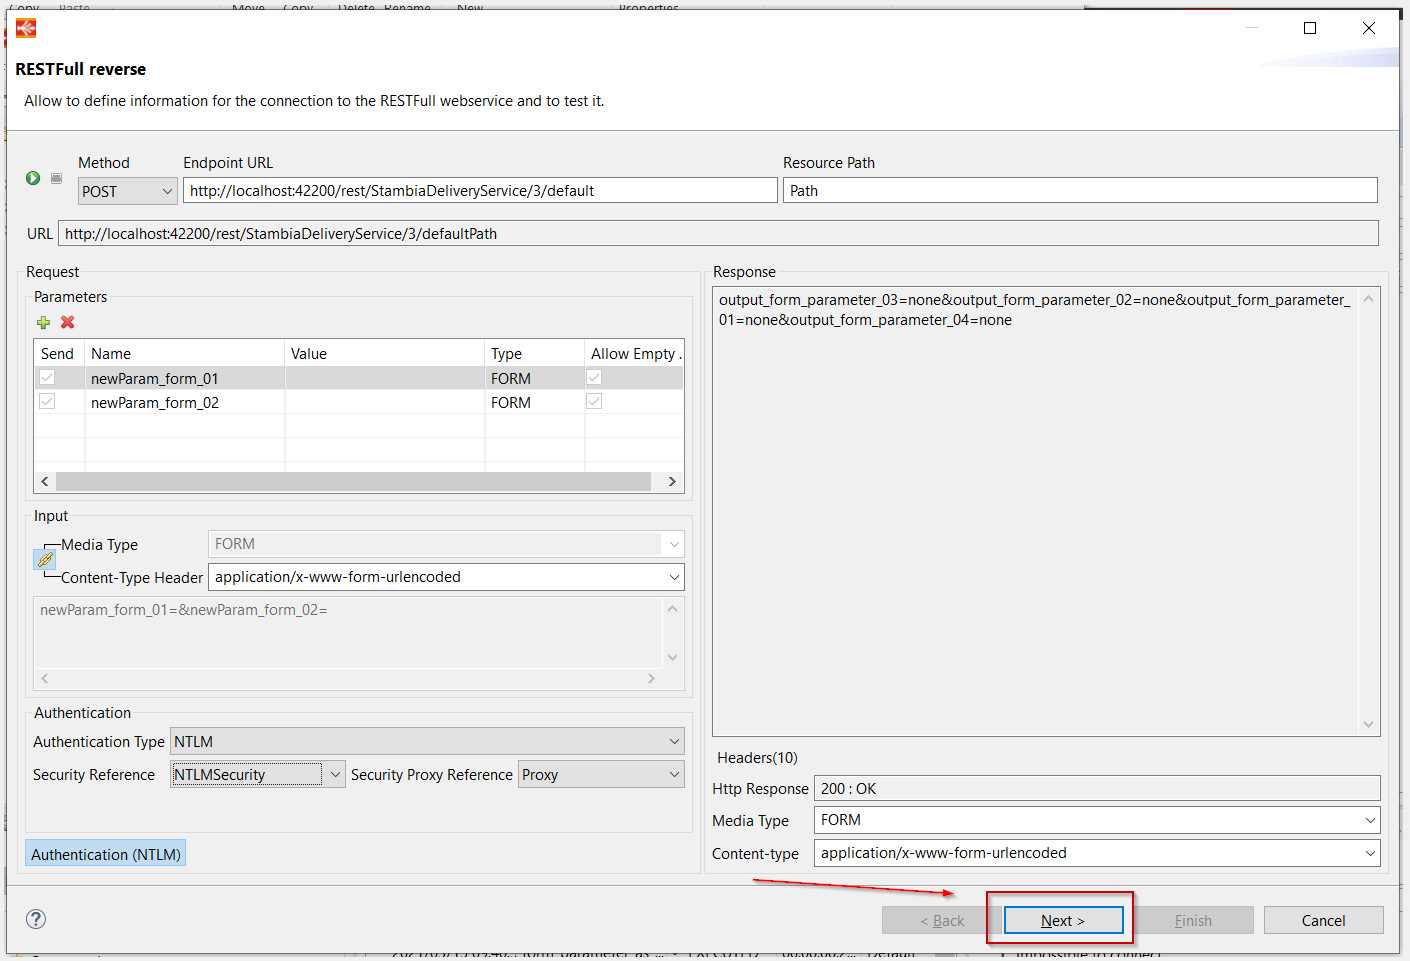
Once you are satisfied with all the request parameters and the response of the Web Service, you can click on the 'Next' button to go to the next step.
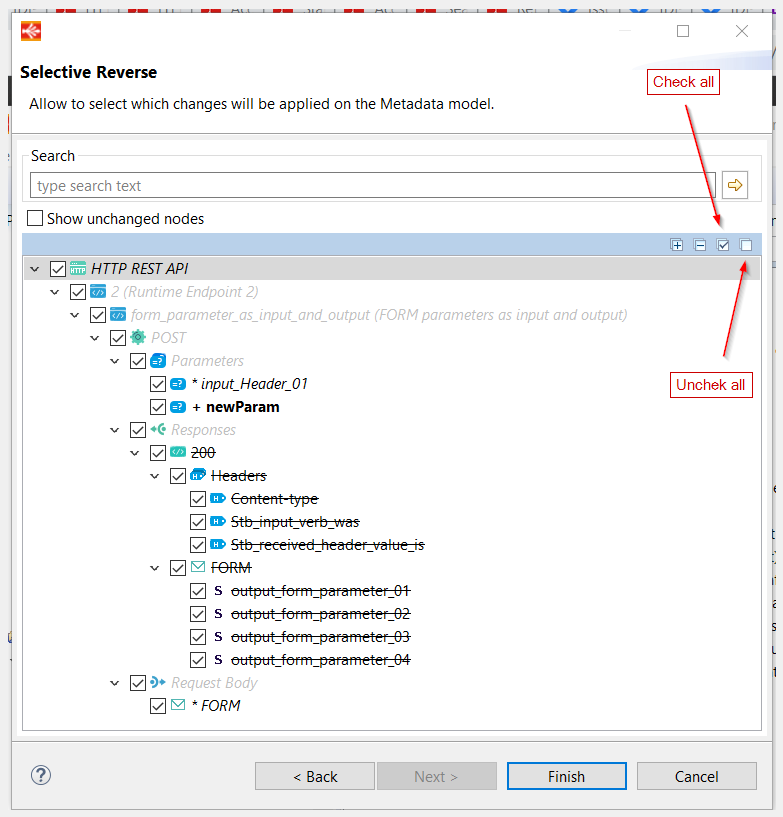
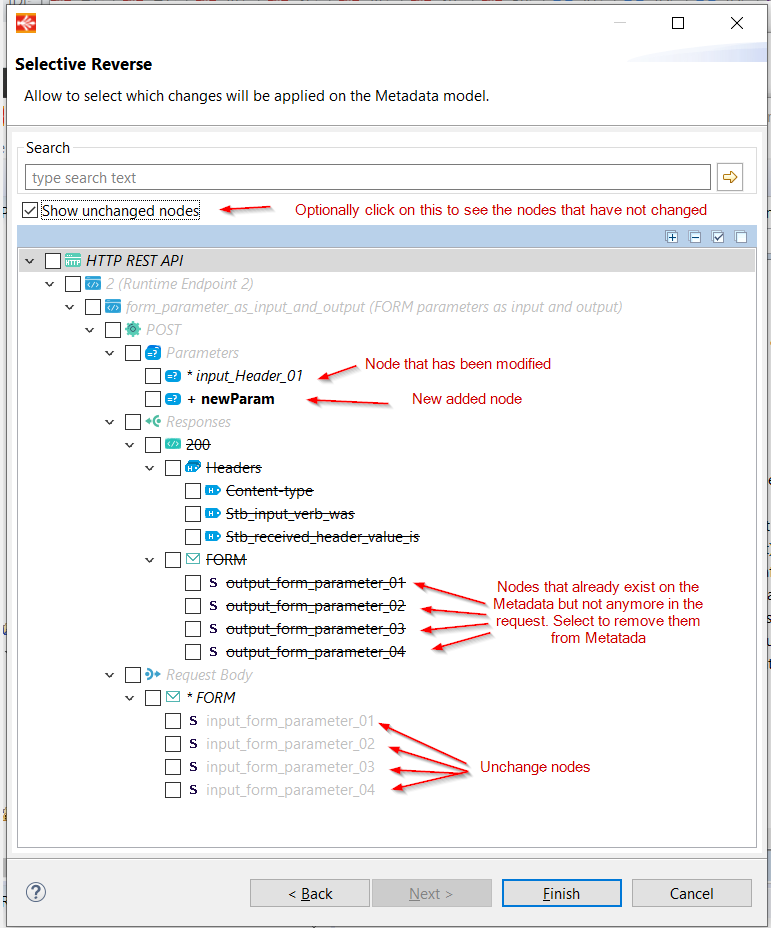
The wizard will transform all the information in Metadata nodes that will be listed in this new window, letting the user select the nodes to reverse in the Metadata.
Simply check the nodes you want to appear in your Web Service Metadata:
Clicking on finish will apply the modifications on the Metadata.
The Reverse of the Web Service is now finished, you can start using it in Mappings.
If you want to test again the Web Service with new parameters or for any reason, you can launch again the REST Wizard on it.
The wizard will open with all the existing request parameters pre-defined.
You'll next be able, in the selective reverse, to choose what changes to apply on the existing Metadata:


